My Account
Related Links: Domains | My BillingOverview | My Account Main Menu | User Profile | Change Password | Manage Addresses | Cart
Overview
The Account Manager is the first area of the Administration that appears after you have logged in. It provides options to:
- manage your user account's user profile
- change the password of your user account
- manage your addresses
- purchase and manage domain names
- complete the purchase of domain names and Web sites via an online shopping cart
- edit your Web sites
- manage your billing
When you log in to the Administration, this is the home page that will load first. It is also the page that will appear when you click the "Home" tab of the Account Manager or if you click the "My Account" link in the main navigation area.
"My Website" allows you to jump to the Website Editor for your Web site. The Website Editor is the tool to modify and manage your Web site. If you only have one Web site, you will see the following screen:

You would then click on the blue text of your sitename to go to the Website Editor.
If you have multiple Websites, you will see the following screen:

Select the site you wish to edit from the dropdown menu provided, and then click the "Select Website" button to enter the Website Editor for that site.
If you have been given permission to access Administration for other users' Web sites, then a second dropdown menu will appear listing those Web sites. You may select a Web site to work with from the dropdown menu and click "Select Website" to edit the site.
"My Billing" allows you to view your current billing method, change your billing method, and view receipts of your past purchases. Click on the blue text "Manage Billing" to the right of the text "My Billing" to go to the Billing Admin.
Back to the Top of the Page
User Profile
In this section, you can change your account information. You can change your name, username, e-mail address, phone numbers, password hint question, the answer to the password hint question, and your password. It also provides access to the manage addresses section of the Account Manager.
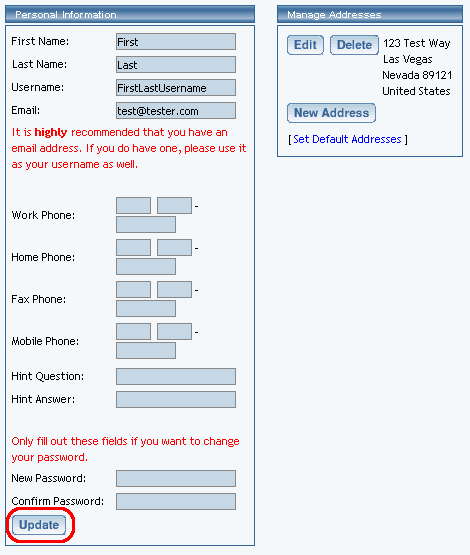
Please keep in mind that your e-mail address is a required field. It is also very important to note exactly what you typed for your password hint question and answer. The password hint question and answer are used by Technical Support to identify you as the owner or as approved personnel for this website.
When you are done making changes to your account, click on the button "Update" to store and apply your changes.

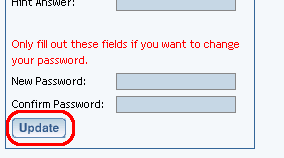
At the bottom of the Personal Information section of "User Profile", you have the option to change your password for your username. This password must be either letters or numbers. This password is also case sensitive, so a password "HelloWorld2468" is different than "helloworld2468". Your password must include at least one letter and at least one number.
Enter in a new password twice, then click on the button "Update" to change the password for your username.
The "Manage Addresses" section allows you to maintain sets of addresses.
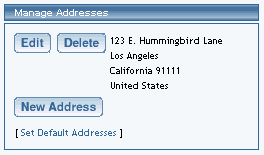
To add an address, click on the button "New Address".

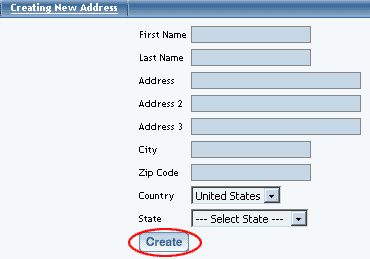
In the new window that the Administration opened, fill out all of the information for your new address. When done entering your information, click on the button "Create".
To edit an existing address, click on the button "Edit" next to the address you want to modify.
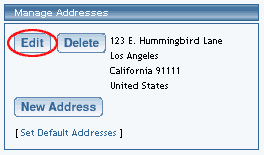
Modify the address as you desire, then click on the button "Update" when done.
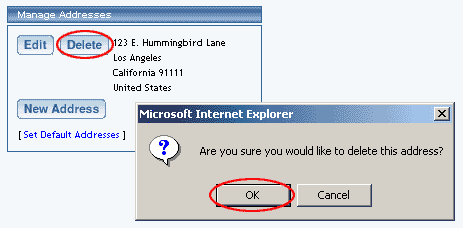
To delete an existing address, click on the button "Delete" next to the address you want to delete. When the pop-up dialog window appears, click "OK" to confirm deletion of the address.
To set an address as a default address for your account, click on the blue text "Set Default Addresses".
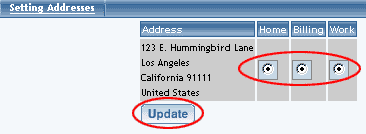
With the new window that appears, click on the radio button for each address to specify whether the address set is for your Home, Billing, or Work. Please keep in mind that you may only have one listed address designated for your Home, Billing, or Work addresses. When done, click on the button "Update" to save and apply your changes.
Back to the Top of the Page
Cart
The Cart is used to purchase your Web site and other Web site-related tools. Anything you purchase within the Administration will be held here for checkout.
In the top-right corner of an Administration page (except when editing a web page), click on the red text of "Cart".
You will see a list of all the items that you have selected to purchase for your Web site. To remove any items, click on the checkbox for the item you wish to remove, and then click on the button "Remove".
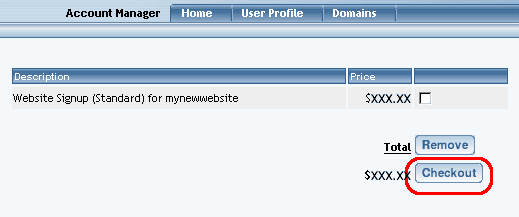
To continue with the checkout process, click on the button "Checkout".
Section 1 lists and details all of the items to purchase for your Web site. If you decline to purchase an item at this time, you may click on the button "Save For Later" for that item.
In Section 2, you would specify your payment method.
When finished looking over the items in your Cart, click on the button "Continue" to continue checking out.
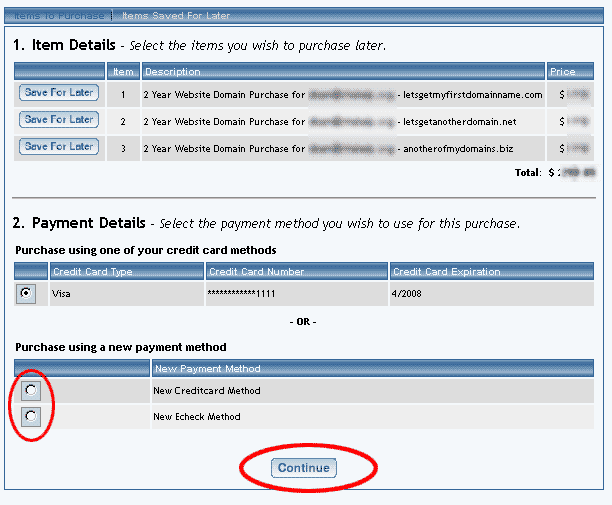
Specify your payment information and your billing address.
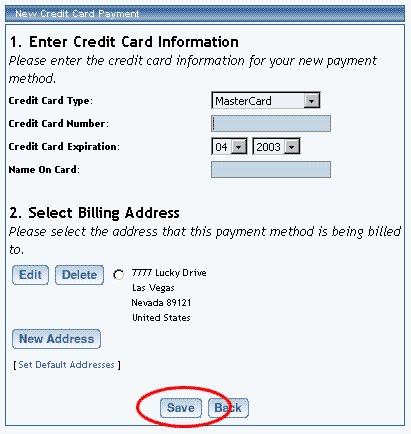
When done, click on the button "Save" to save your payment information and billing address.
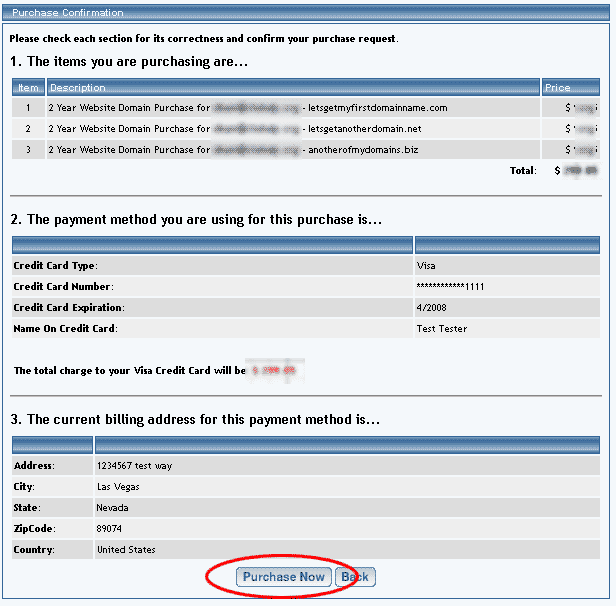
The Administration will then separate the page to detail the item(s) you are purchasing, the payment method you are using, and your current billing address. Click on the button "Purchase Now" to continue to purchase the items for your Web site.
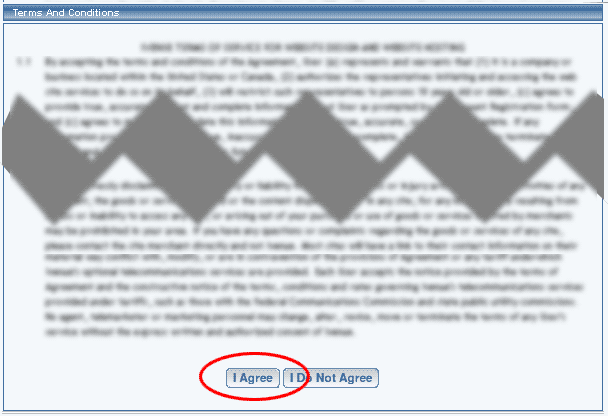
Please read the entire Terms of Service for purchasing these items for your Web site. If you do not have the time to read it now, please print this page out for your records to read at another time. To continue, scroll down to the bottom of the page and click on the button "I Agree".
The last screen will display a receipt of your purchase. Please print this page out for your records.
