Website Editor
Edit Pages | Overview | Properties | E-Commerce | Change Website | Tool BoxOverview
The Website Editor area of Administration allows you to manage all aspects of a Web site. When you access Website Editor, its secondary navigation bar provides tabs to access its major subareas:
- Edit Pages offers a main menu for managing the site's pages, to publish and view your site, and to access the Page Editor.
- Properties lets you manage Web site information such as addresses, contact information, the site's name and password for login, etc.
- Ecommerce provides a comprehensive set of options to set up and manage the site's product catalog and shopping options.
- Change Website allows you to switch to another Web site's Website Editor without having to return to the Account Manager home page.
- Tool Box offers tools to manage the site's physical files and password protect directories, work with forms and their submissions by visitors, manage which other users can access which part of the site's Administration, and much more.
Edit Pages
The Edit Pages section of the Website Editor lets you manage all of the pages in your site. You also use the options on Edit Pages to manage your site's stylesheets and palette, to check your site's pages before you publish, to publish your site, to change to a different site to work on it, and much more. Following is a list of the many options offered by Edit Pages. Click each for more information:
Activate Website
This link allows you to add this Web site to your cart so that you can activate and purchase this Web site. Once the Web site has been activated, this link will disappear from the Administration.

Back to the Top of the Page
Create New Page
To create a new page, click on the link "Create New Page". The Website Editor will reload the page with information for your new page.

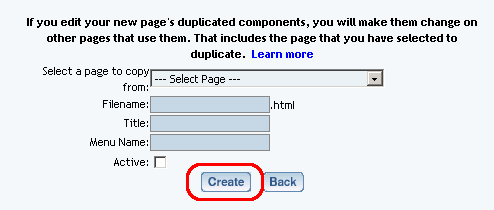
Select a page that you may wish to copy, if not, do not choose an option for the drop-down menu next to the text "Select a page if you wish to copy it". Enter the filename of the new page (do not add the file extension) in the text field next to the text "Filename". Enter in the title of the page in the text field next to the text "Title". Enter the name of the menu for this page in the text field next to the text "Menu Name". If you want the page to be active or enabled when it is created, checkmark the box next to the text "Active". Please keep in mind that the filename should not have any spaces and that the filename is case sensitive. That is, a Web page called "Location.ivnu" is different than "location.ivnu".
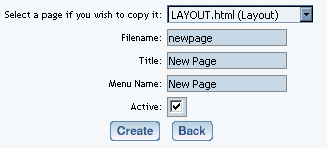
When a page is copied, the Administration creates an exact replica of the page. All components on the previous page, except for container components, will be used by the new page. Any container components will be copied to the new page; any components inside of a container component will be used by the newly created page.
When done entering in the information for the new page, click on the button "Create". If you do not want to create a new page, click on the button "Back" to return to the Website Editor main menu.
Back to the Top of the Page
Add Splash Page
To create a splash introduction page that will display when visitors first arrive at your Web site, click on the link "Add Splash Page". The system will then create a splash.html page for your Web site; this page will be the first page that a customer will see when they visit your site.
The splash.html is a normal page, but a Flash component will be places on the page and will take up the whole page as it is displayed on a visitor's Web browser. The Flash component can be modified and removed as a normal Flash component.

Back to the Top of the Page
Pre Publish Checks

When you run a pre-publish check on your Web site, the Pre Publish Checks tool will check your website to see if your calendars, forms, and product items are set up correctly (if you have those components set up on your website). If you have those components, you will see something similiar to the following when you run the Pre Publish Check:

If you get an error message, "FAILED", you will need to correct the error before continuing. Click here for more information on form components, calendar components, and item components. For this example,...

...no valid calendar was chosen for this calendar component. This particular issue can be corrected by selecting an appropriate calendar to assign to the calendar component:
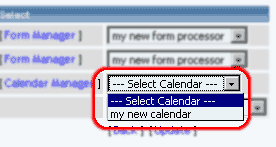
Once corrected, click on the link "Update" to have the Pre Publish Checks process check your setting again:

If there are no errors, the link "Publish" will appear in the bottom-right corner:

Click on the link to continue to Publish your Web site.
Back to the Top of the Page
Publish
When you publish your site, the Administration will integrate all changes that you've made via the Website Editor, including any file uploads, page additions, etc. Pages that you had marked as "disabled" will be skipped by Publish and can't be viewed on the published site. No one can edit the site while it is being published. This reduces the chance of errors.
(Please note: If your only changes were to the site's files, for example uploading new images or updating catalog images to generate new thumbnails, then you don't need to use "Publish" to make these changes visible on the viewed site. Instead, use the Sync Website option of the File Cabinet Manager. It completes much faster than a full Publish does.)
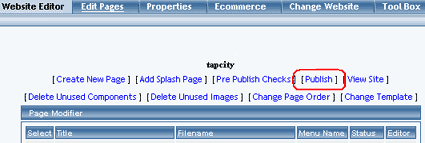
To publish your site, click the "Publish" link. A small window will appear showing the progress of your publish request:
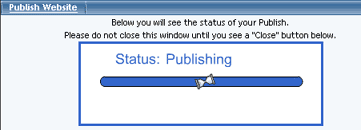
First, your publish request is queued. When its turn comes, the site is checked for any errors that would interfere with publishing (such as graphics for navigation buttons still being created). If it passes all tests, then publish is performed. The status is indicated on the Publish pop-up window:
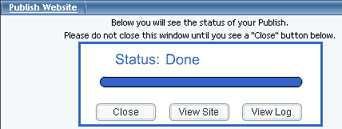
When the publish process is completed, you will see the following. If an error is reported instead of successful completion, then click the "View Log" button for details about the error. Otherwise, click the "View Site" button to see how the site looks now that it has been published:
Back to the Top of the Page
View Site
Click this button to view your Web site. When you view the Web site, you will only see the information that was last published for your Web site.

Back to the Top of the Page
Delete Unused Components
When you click on "Delete Unused Components", a new window will appear. The Administration will display all of the components that it detects that is not in use on your Web site.

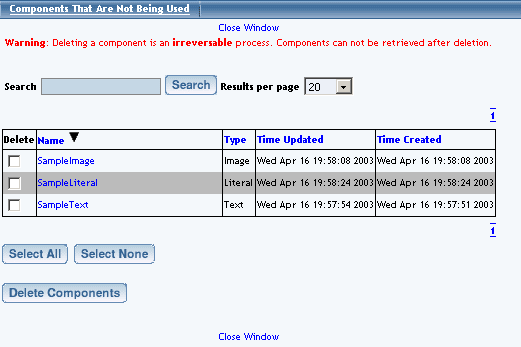
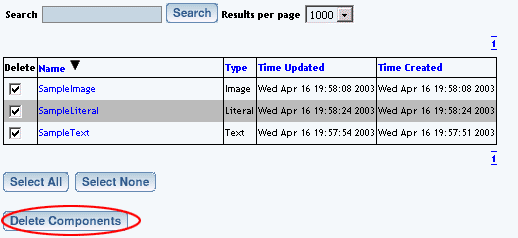
All unused components will be displayed in a table with information on the name of the component, the component type, the last time the component was updated, and the time the component was created. You can sort the list of components alphabetically by clicking on the name of the column. If you click on the column name again, the Administration will list the components by alphabet in reverse.
If you click on the name of the component, the Administration will bring up a new window displaying what the component looks like. You can then click on the button "Mark For Deletion" to designate this component to be deleted. When done viewing the component, click on the button "Close" to close the window.


If you have many unused components, you can sift through pages of components by clicking on the page number to jump to that page.

You can also search for unused components by using the provided field next to the text "Search" at the top of the window. After you have entered in the keyword(s) to search for, select how many results you want to list in the drop-down menu next to the text "Results per page". To search for your keyword(s), click on the button "Search".

To delete unused components, click on the checkbox in the column "Delete" for the component. To select all of the components to delete, click on the button "Select All". To deselect all of the components, click on the button "Select None". When you are done designating which components to remove, click on the button "Delete Components".
If you are done deleting unused components, close the window by clicking on the blue text "Close Window".
Back to the Top of the Page
Delete Unused Images
When you click on "Delete Unused Images", a new window will appear. The Administration will display all of the image files that it detects as not in use on your Web site.

If you want to specify how many image files will be listed on one page, choose the number of files you would like to display from the drop-down menu next to the text "Results per page".
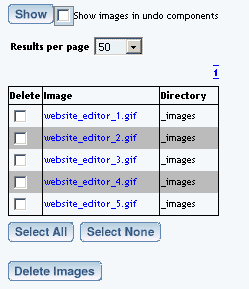
You can also specify if you would like to display image components that have recently been removed from the page due to an "Undo" command in the Page Editor. Check the checkbox next to the text "Show images in undo components". You must then click on the button "Show" to update how your images will be displayed.
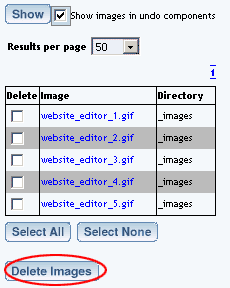
All unused images will be displayed in a table with information on the name of the image and the location of the image file.
If you click on the name of the component, the Administration will bring up a new window displaying what the image looks like. You can then click on the button "Mark For Deletion" to designate this image to be deleted. When done viewing the image, click on the button "Close" to close the window.
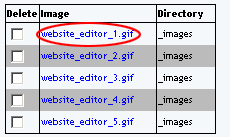
If you have many unused images, you can sift through pages of images by clicking on the number of the page to jump to that page.
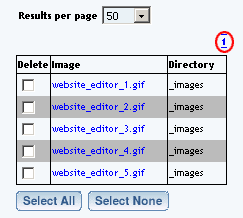
To delete unused images, click on the checkbox in the column "Delete" for the image you want to delete. To select all of the images to delete, click on the button "Select All". To deselect all of the images, click on the button "Select None". When you are done designating which images to remove, click on the button "Delete Images".
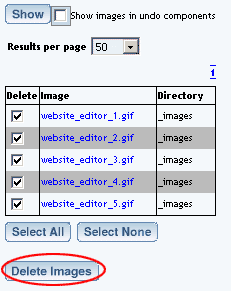
If you are done deleting unused images, close the window by clicking on the blue text "Close Window".
Back to the Top of the Page
Change Page Order
You use the "Change Page Order" option to change the order in which buttons will appear in your Web site's menus (Navigation Components).
From the Administration home page, click on the blue text of your sitename. Click on the link "Change Page Order".

The Change Page Order Tool opens in a new window. You will see a list of all of your pages for your Web site. Click on a page name and then use the arrows to move the page up and down the list.
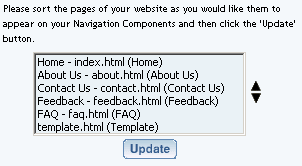
If you have to move a page from close to the bottom of a long list to the top (for example, trying to move your page #101 to the top of the list), click on the page name and click on the filename that you would like to move the first selected page in front of.
For example, if you have a list of 10 pages and wanted to move page 10 between page 1 and page 2, you would click once on page 10 ...
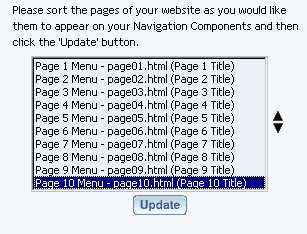
... and click once on page 2. The Administration will then move pages 2 through page 9 down the list and will move page 10 to the second spot, and now page 10 will be the second listed page and page 2 will be the third listed page, and so on...
When you are finished configuring the arrangement of your pages, click on the button "Update" to save and apply your changes to the Web site.

Back to the Top of the Page
Change Layout
If you want to change the layout and structure of your Web site, you would use this option. You also have the choice of keeping all of your components or deleting all components when you change the layout.
From the Administration home page, click on the blue text of your sitename. In the section "Select A Page To Begin Customizing", click on the text "Change Layout".

The Administration will then bring up a new window to change your layout. Select your business industry in the prodvided drop-down menu next to the text "Industry". Select a layout that you would like to use by clicking on the link "Choose Layout".
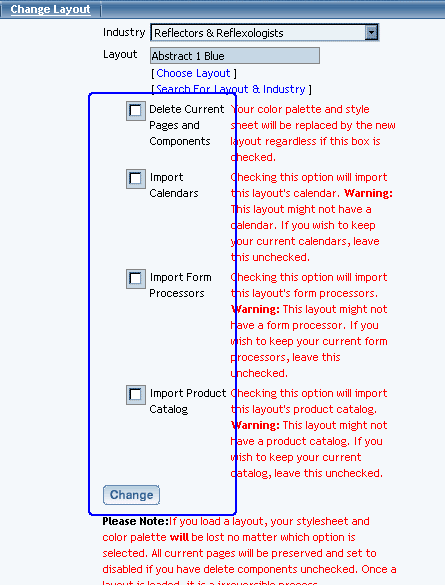
If you want to delete all of your components, checkmark the check box next to the text "Delete Current Pages and Components". If the checkbox is unchecked, all of your components will be untouched and will be available to be copied or used on your Web pages (you will get duplicate pages if you already have pages with the exact same page names of the layout - to prevent this, rename your pages to names that the layout does not use). If the checkbox is checked, the Administration will remove all of your pages, files and images and replace them with the pages, files, and images from the layout.
Check the checkboxes next to the appropriate options if you wish to import calendars, forms, or the product catalog from the layouts. If you do import them, they will replace your existing calendars, forms, or product catalog. This operation is irreversible, so please make sure if you will be overwriting your existing information.
Please keep in mind that changing your layout will also cause the Administration to replace your Color Palette and Style sheet when you change layout, as explained in the red text above the button "Change Layout".
To continue with changing your layout, click on the button "Change Layout".
Back to the Top of the Page
Page Modifier
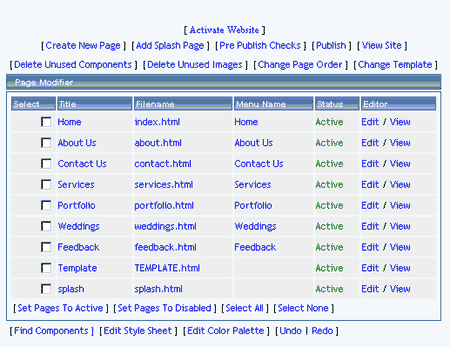
The Page Modifier section contains a list of all of the pages on your Web site.
Select
Title
File Name
Menu Name
Editor

Select
The checkboxes to the left of the pages allow you to select multiple pages to manage. Checkmark the pages you want to affect, then click on the links at the bottom of the list: "Set Pages To Active" and "Set Pages To Disabled".

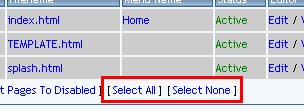
If you want to select all of your pages, click on the blue text "Select All" at the bottom of the page list. If you want to select none of your pages, click on the blue text "Select None" at the bottom of the page list.
Back to the Page Modifier
Back to the Top of the Page
Title
Here you can specify the title of the Web page. The title is displayed in the top-left corner of the Internet browser when the page is viewed.
Click on the title of the page to change the title.
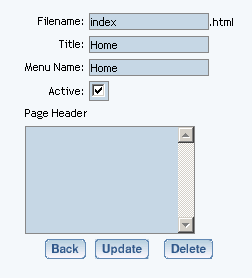
The Administration will reload the page and give you the option to change the filename, the title, and the menu name. Once you have finished making your changes to the page, click on the button "Update" to save and apply your changes to the page. If you want to delete this page, click on the button "Delete".
Back to the Page Modifier
Back to the Top of the Page
Filename
The filename of the page is how the Internet world will be accessing the Web page. The filename can only contain letters or numbers, to be compatible with the Web standards for page names. Please keep in mind that the filenames are case sensitive. So, for example, the page "aNewPage.html" is a totally different page than "anewpage.html".
Click on the filename of the page to change the filename.
The Administration will reload the page and give you the option to change the filename, the title, and the menu name. Once you have finished making your changes to the page, click on the button "Update" to save and apply your changes to the page. If you want to delete this page, click on the button "Delete".
Back to the Page Modifier
Back to the Top of the Page
Menu Name
If you create a navigation component to use for all of your pages and set it to automatically create the navigation, the navigation component will use the Menu Names of the pages as the text for the menu links.
Click on the menu name of the page to change the menu name.
The Administration will reload the page and give you the option to change the filename, the title, and the menu name. The "Page Header" section allows you to see or modify any HTML or Javascript code that you added to the HEAD section of the page. Once you have finished making your changes to the page, click on the button "Update" to save and apply your changes to the page. If you want to delete this page, click on the button "Delete".
Back to the Page Modifier
Back to the Top of the Page
Editor
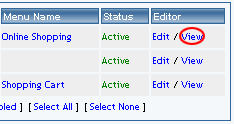
To begin editing a page, click on the blue text "Edit" that is in the same row as the page you want to modify You will then be taken in to the Page Editor.
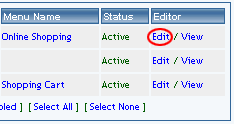
To view a preview of the page, click on the blue text "View" that is in the same row as the page you want to modify. This link will open a new window that will display a preview of the page (this will work whether the page has not been published and/or is disabled). This differs from the View Site link, since the View Site link will display the last published information of the Web site (which will not show any disabled pages).
Properties
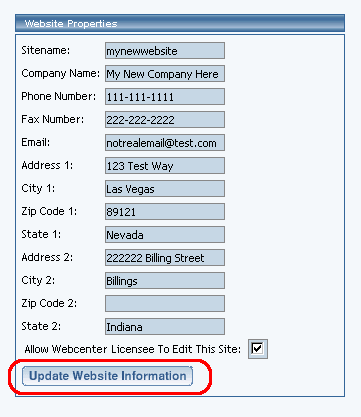
The "Website Properties" section allows you to change the sitename, add/modify your address information, change the business type, and give access to the WebCenter owner to modify your Web site.
From the Administration home page, click on the blue text of your sitename. Click on the secondary navigation menu link "Properties".

Enter in any changes or additions of your address information.
If your Webcenter Owner will need access to modify your Web site, please check the box next to the text "Allow Webcenter Licensee To Edit This Site".
When you are done making changes to the properties of the Web site, click on the button "Update Website Information".
Back to the Top of the Page
Change Website
If you have multiple Web sites, you can choose which Web site to work with in this section.
From the Administration home page, click on the blue text of your sitename. Click on the secondary navigation menu link "Change Website".
Select the Web site you want to work on in the drop-down menu and then click on the button "Select Website".
If you have been granted permission to edit another user's Web site, select that Web site under the section "Other Websites" and click on the button "Select Website" in the same section.

Back to the Top of the Page
Tool Box
-
File Cabinet Manager
Password Protection
Website Statistics
Image Tool
Form Processor Manager
Form Processor Browser
Rebuild Search Engine
Website Permissions
Create a New User Account
Chat Room Admin
Website Promotion
Website Analyzer
Contact Manager
Calendar Manager