Working with Packages
Related Links: 10-Step Guide on Setting Up E-commerce | Product Catalog Management | Package Management PageOverview | When Should I Use a Package? | Step 1 - Define Your Choices | Step 2 - Configure Your Package | Step 3 - Configure Your Package Option Groups | Step 4 - Configure Your Package Options
Packages can be a very useful grouping of products, able to display and organize your products to your Web site visitors in a more efficient manner. A product such as a "customize your own computer" or a "sub sandwich" would be best added to the Web site as a Package.
When Should I Use a Package?
Because Item Groups are similar to Packages, it can be difficult to know when to use a package. Item Groups should only be used if all you are doing is grouping a bunch of items together for your Web site visitors. For example, an Item Group can be used to present different sizes of t-shirts, assuming that each size has a different price. In general, Packages should be used if you want to present your customer with choices that will affect the price of the entire Package. Here are two examples, one product of a "customize your own computer" and one product of "sub sandwich":
- case #1
- case #2
- motherboard #1
- motherboard #2
- processor abc1000
- processor abc2000
- "normal" graphics card
- awesome graphics card
- 256 MB RAM
- 512 MB RAM
- 1024 MB RAM
- 100 GB
- 500 GB
- operating system #1
- operating system #2
- 15 inch flat panel monitor
- 30 inch flat panel monitor
- game #1
- game #2
- word processor
- spreadsheet program
- presentation program
- home productivity suite
- white
- wheat
- roast beef
- turkey and ham
- veggies only
- seafood
- meatball
- club
- bell peppers
- lettuce
- onions
- pickles
- tomatoes
- cheese
- oil
- pepper
- salt
- vinegar
|
customize your own computer 1st choice - choose a case: 2nd choice - choose a motherboard: 3rd choice - choose your processor: 4th choice - choose your graphics card: 5th choice - choose your memory 6th choice - choose your storage: 7th choice - choose your operating system: 8th choice - choose your display: 9th choice - choose your software: |
sub sandwich 1st choice - choose your bread: 2nd choice - choose your type of sandwich: 3rd choice - choose your veggies: 4th choice - choose your condiments: |
Step 1 - Define Your Choices
Step one involves identifying your choices and options, as well as determining whih affects the price of your Package. For our sub sandwich example, the first choice is the choice of bread. To make things simple, let's assume that the choice of bread does not affect your price. As such, we'll set up the bread choices as options instead of items:
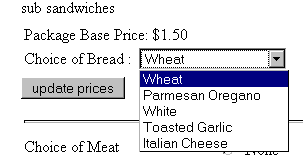
As for the second, third, and fourth choices, an item will have to be created for every one of the options to select. So, there will be an item for "roast beef", "turkey and ham", "veggies only", "seafood", "meatball", "club", "bell peppers", "lettuce", "onions", "pickles", "tomatoes", "cheese", "oil", "pepper", "salt", and "vinegar". Click here for more information on Items. Once the items are created, the next step is to create the Package.
Step 2 - Configure Your Package
To add a new package, click on the "New" button located in the package section. The package management page will open in a new browser window.
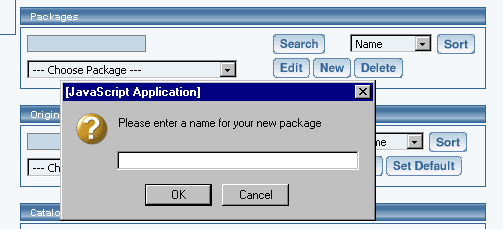
At the very least, enter in the name for the package in the text field "Name". For our example, our name would be "sub sandwiches"
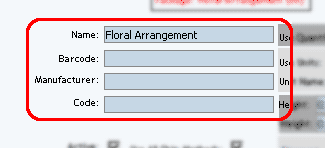
Enter in the starting retail price in the text field "Price". This is the base price that will be displayed and charged for the main "starting" items in the package, not the final price of the complete package. If you have a manufacturer’s suggested retail price ( MSRP ), you place that price in the text filed "MSRP". If this value is greater than zero, it will be displayed above the retail price on the item page in the catalog. If no value is entered, the MSRP will not be displayed. If the MSRP is less than the retail price (other than zero), the system will display the MSRP but will put a slash through the MSRP price. For our example, the starting retail price of our sub sandwich will be "1.25".

For more information on setting up your package, click here for more information. For right now, you have already set up the basics for your package. You are now ready to create an Package Option Group.
Step 3 - Configure Your Package Option Group
An option group is a collection of items that make up one choice in a package. A customer will be able to select one item, no items, or multiple items from the option group, depending on how the group is set up. Click on the tab "Option Groups" when you are editing the Package.
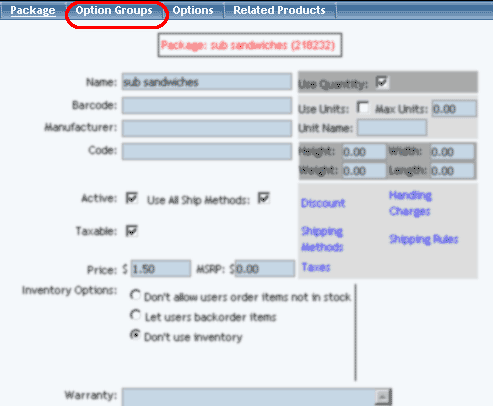
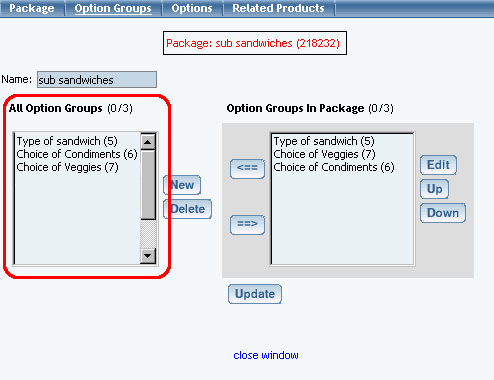
A list of all available option groups will be listed on the left side of the administration page.
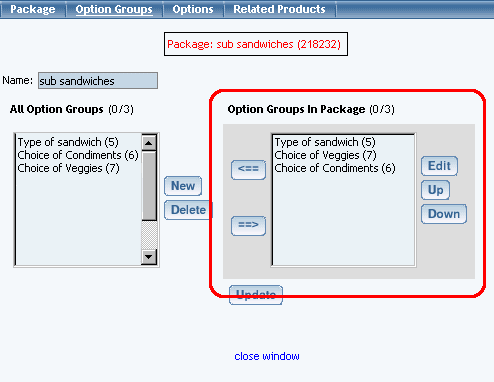
Option groups that are currently used by the package will be display to the right.
To create and define a new option group, click on the "New" button near the center of the administration page. Enter the name of the option group in the pop-up dialog box. The new option group will then be added to the "Available Option Groups" section.

For more information on setting up your package option group, click here for more information. For our example, an option group would be created for "Choose your type of sandwich", "Choose your veggies", and "Choose your condiments" - so a total of 3 package option groups would be created.
Step 4 - Configure Your Package Options
For this final step, we will define prices for items that will only apply for Packages. Click on one of the package option groups, then click on the button "Edit".
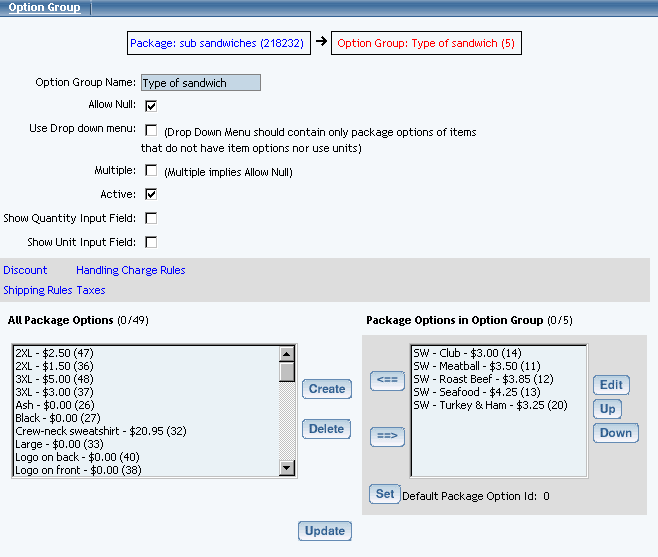
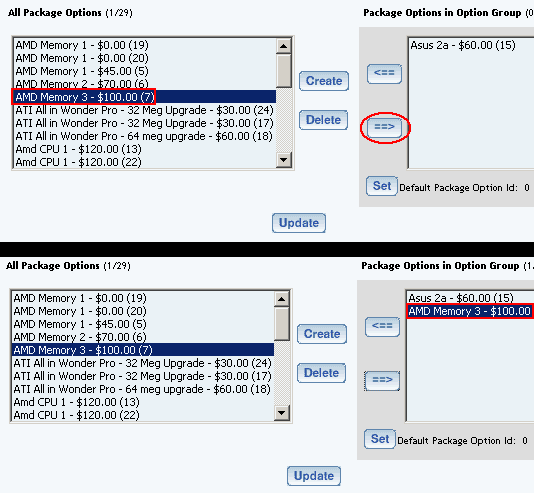
The box on the left displays all of the package options for items that are in the system. The box on the right displays all of the package options for items that are applied to this package. To apply an existing package option to this package, click on the package option in the "All Package Options" section. Click on the "Right" arrow button. The option will be added to the option group.
To create a new package option for an item, click on the button "Create". You will see the following screen:
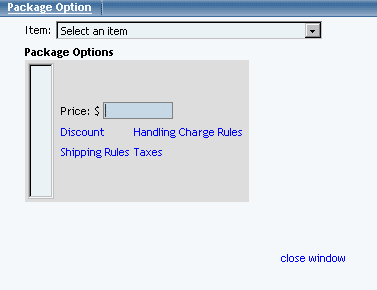
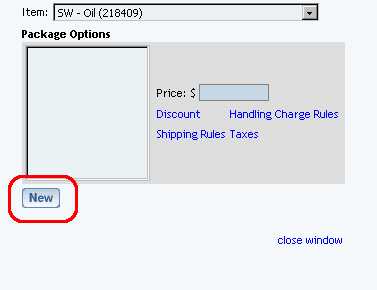
In the drop-down menu next to the text "Item", choose one of the items that you want to apply a price for. This price will only apply to packages. Once you have selected an item, enter in a price in the field "Price", then click on the button "New" (Please note, that the button "New" will only appear onc eyou have selected an item).
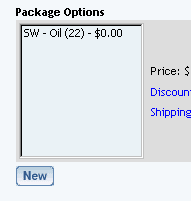
Once a price has been added, it will appear to the box on the left. This box shows you all of the package options that have been applied to this item.
Repeat this process for all of the items. When done, click on the blue text link "close window". You will then be back at the package option group editing screen. Select all of the package options for items (to select more than one, hold down the CTRL key and click on multiple selections) the box in the left and then click on the button that looks like an arrow pointing to the right.
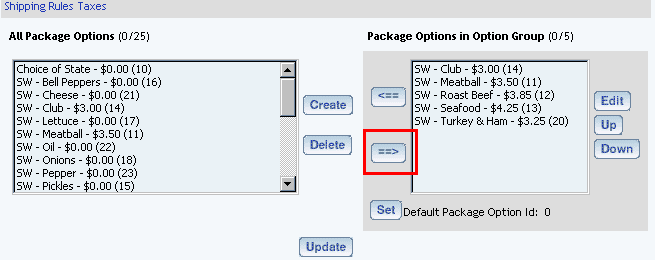
Please keep in mind that you are only providing options for the "choice" that is the option group. For this example, the option group "type of sandwich" will only have package options applied for the items labelled "roast beef", "turkey and ham", "veggies only", "seafood", "meatball", and "club". The option group "choice of veggies" will only have the following package options for items labelled "bell peppers", "lettuce", "onions", "pickles", and "tomatoes". The option group "choice of condiments" will only have the following package options for items labelled "cheese", "oil", "pepper", "salt", and "vinegar".
Click on the button "Update" to store your changes to the Package. You must still Publish to apply your changes to the Web site. For more information on setting up your package options for your item, click here for more information.
Once done, you'll see our example as:
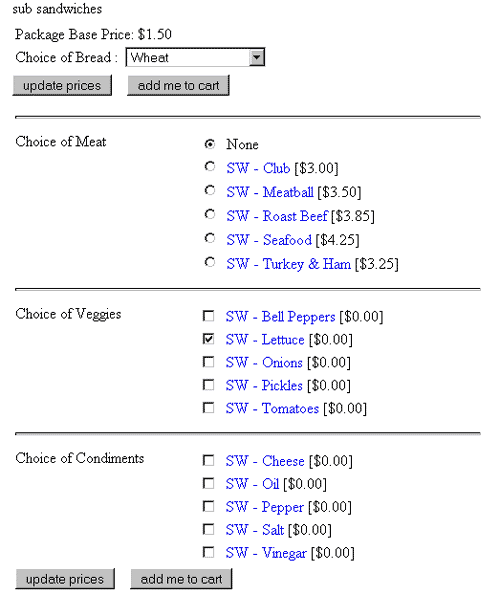
Once you have a number of options selected, you would click on the button "Update Price" and then you would be able to add that Package to the shopping cart.
Related Links:
-
Package Option Groups
Package Discount Rules
Package Shipping Methods
Package Shipping Rules
Package Tax Rules
Package Handling Charges
Product Catalog Management
10-Step Guide on Setting Up Ecommerce
Back to the Previous Page