Discount Rules
Related Links: 10-Step Guide on Setting Up E-commerce | Product Catalog RulesOverview | Discount Descriptions | Add a Discount Rule | Modify a Discount Rule | Discount Rules For Shoppers
Overview
Apply price reductions based on custom rules. Discounts can be applied to an item, a package option, a package or globally.
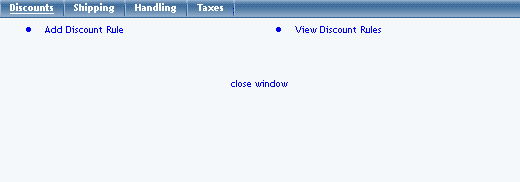
Navigation: Click on the "Ecommerce" text link located at the top of any main administration page. Click on the "Product Catalog Rules" text link. The "Discount Rules Administration" page will load in a new window.
Any existing discount rules will be displayed when the administration page is accessed. Item specific rules are listed first, in the order that they were created. Global rules are listed afterward.
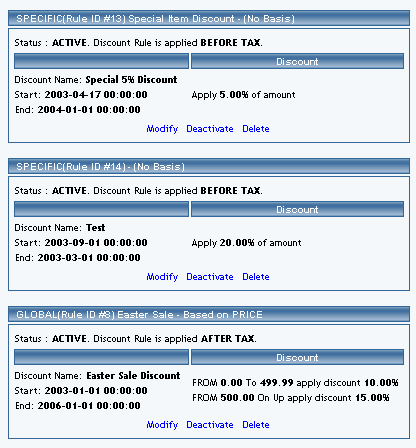
The rule basis refers to how the calculation is performed. "No Basis" means that the rule has been applied as a single value, such as a percentage of the product price, or a single "Flat Rate" that is applied when a purchase is made.
A global discount will apply to all products purchased. The global discount, however, will be overridden if a specific rule is used for any product in the catalog.
From the second drop-down menu, select the applicable tax-state of the discount: Before Tax or After Tax. The system default is Before tax.
Step Four: Type of Discount and Calculation
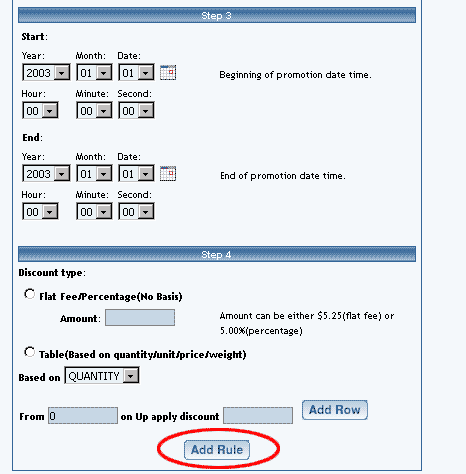
To create a rule that will calculate the discount based on a table of values and/or a specific basis (such as unit, quantity, or weight), click on the radio button next to "Table". Specify what the rule will be based on by selecting QUANTITY, UNIT, WEIGHT, or PRICE from the drop-down menu provided.
All listed options and fields can be changed by modifying the desired option or by typing over any text/value displayed.
The discount details for items page will load in the current window.
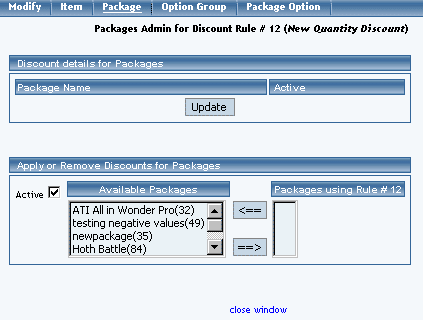
The discount details for packages page will load in the current window.
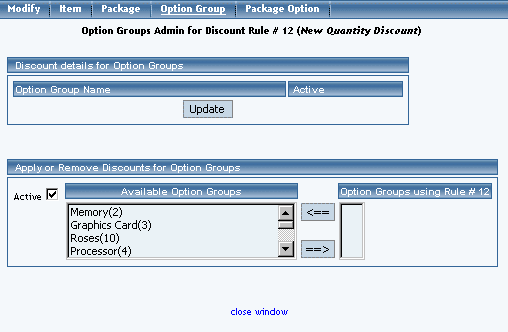
The discount details for option groups page will load in the current window.
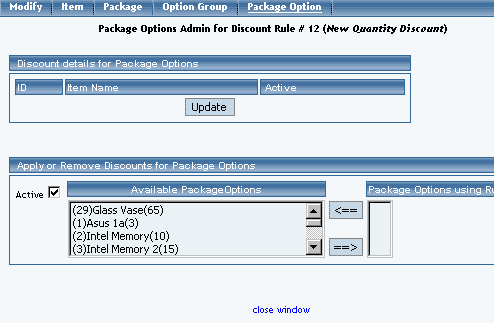
The discount details for package option groups page will load in the current window.
Back to the Top of the Page
Discount Descriptions:
The heading of each discount rule includes a type indicator (SPECIFIC or GLOBAL), the rule ID Number, the rule Name, and the Basis for the rule.
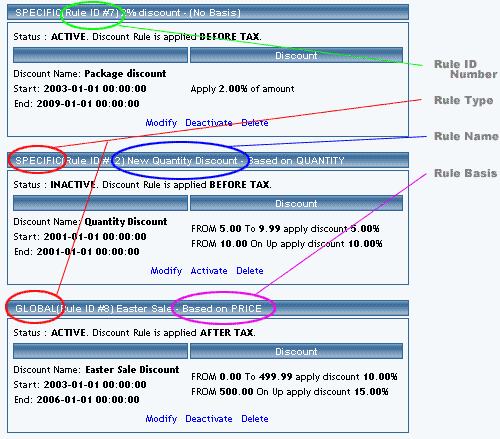
When a basis is listed, this means that 1) the rule is applied based on Quantity, Unit, Weight, or Price, or 2) a table of values has been created to calculate the charge. The basis indicator is listed as "Based On" with a type identifier, such as "Units" or "Quantity". In such cases, the discount is variable based on the "price" or "unit", and is calculated from a pre-defined table of values.
Below the main heading is a status indicator (Active or Inactive) and a tax indicator (Before Tax or After Tax). These settings can be modified from the rule’s administration page.
The "Discount Name" is different from the "Rule Name". The discount name is the text that will actually display in the catalog and shopping cart whenever a discount is applied.
The starting and ending date of the discount is listed. Discounts are automatically applied and deactivated according to the dates and times listed.
The actual discount amount is shown, as it will be applied. If a basis exists for the rule, the table of values will be listed.
To deactivate or activate a rule, click on the "Deactivate" or "Activate" text link located at the bottom of the rule. The screen will refresh with the applied change.
To delete a rule, click on the "Delete" text link.
To modify a rule, click on the "Modify" text link. The modify discount rule administration page will load in a new window.
Back to the Top of the Page
Add a Discount Rule
Add and define a new product discount rule
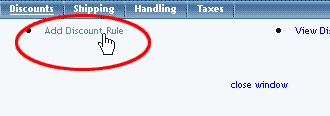
Navigation: Click on the "Ecommerce" text link located at the top of any main administration page. Click on the "Product Catalog Rules" text link. The "Discount Rules Administration" page will load in a new window. Click on the "Add a Discount Rule" text link.
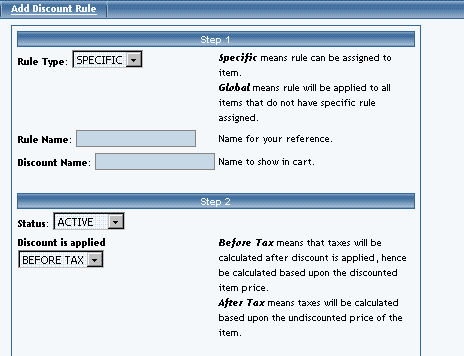
Step One: Name and define the Rule Type
From the drop-down menu, select "Specific" or "Global" for the rule type.
A specific rule is applied to individual items, package options, and/or packages. After defining a specific rule, the rule must be added to any products in order to be applied.
Type in a rule name and a discount name. The rule name identifies the rule for administrative purposes. The discount name is actually displayed in the catalog and shopping cart whenever the discount is applied.
Step Two: Defining the Rule Status
From the first drop-down menu, select whether or not the rule will be created as an active or inactive rule. The system default is active.
Step Three: The Discount Duration
Define a starting date and time, and an ending date and time. Click on the calendar icons to select a date from a calendar-style pop-up window, or use the drop-down menus provided.
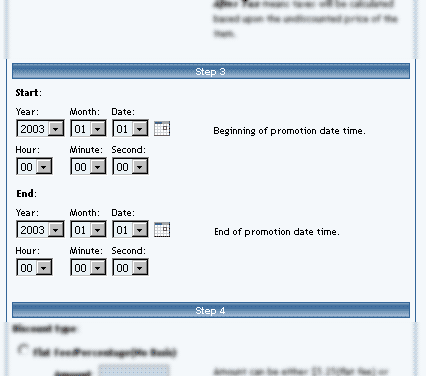
To create a rule that will apply a single discount based on the price, click on the radio button next to "Flat Fee/Percentage (No Basis)". In the "Amount" field provided, type in the discount amount. For a flat fee, type the value in currency format i.e. 3.25 for three dollars and twenty-five cents. To apply a percentage, enter the numeric value followed by a percentage sign, such as 5%.
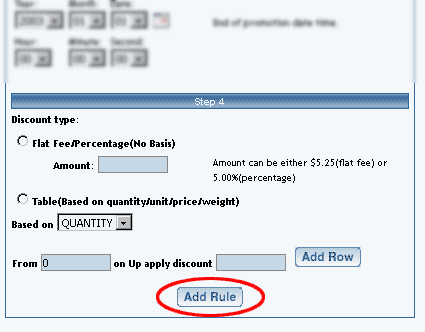
Type the minimum value of the rule next to the "From" field in the space provided. As an example, if the discount is to be applied only when a customer orders a quantity of 10 or more, enter "10" in the field. Enter the discount amount to the right of "Discount" in the space provided. The discount value can be entered as a dollar amount or a percentage (such as 10%).
To create a table of values, click the "Add Row" button. A second row identical to the first will appear. Type the second set of values in the space provided. Continue adding as many rows as needed to finish building the discount table.
Click the "Add Rule" button once the rule has been successfully defined. The page will refresh to the "Modify Discount Rule" administration page.
Back to the Top of the Page
Modify a Discount Rule
Modify the details of an existing discount rule.
Click on the "Ecommerce" text link located at the top of any main administration page. Click on the "Product Catalog Rules" text link. The "Discount Rules Administration" page will load in a new window. Click on the blue text "Modify" for the Discount Rule that you would like to change.
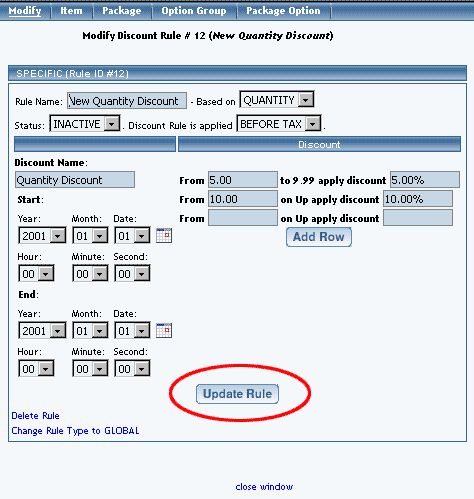
For a detailed description of each option, see the "add discount rule" administration page.
To convert a Global Rule to a Specific Rule, or to change a Specific Rule to a Global Rule, click on the applicable text link located at the bottom of the administration page.
To delete this rule, click on the "Delete" text link located on the bottom of the administration page.
When finished with modifications, click on the "Update Rule" button to save any changes made to the discount rule.
To view which items this rule applies to, or to add this rule to items, click on the "Item" text link located at the top of the administration page.

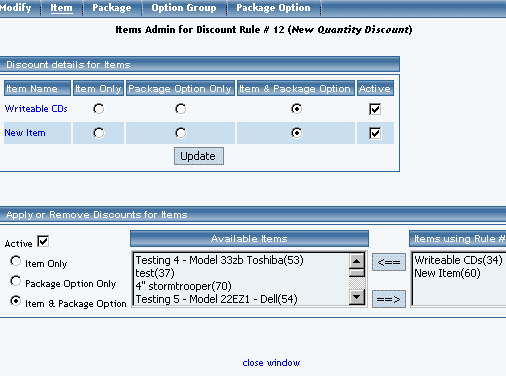
To view which packages this rule applies to, or to add this rule to packages, click on the "Package" text link located at the top of the administration page.

To view which option groups this rule applies to, or to add this rule to an option group, click on the "Option Group" text link located at the top of the administration page.

To view which package option groups this rule applies to, or to add this rule to package option group, click on the "Option Groups" text link located at the top of the administration page.

10-Step Guide on Setting Up Ecommerce
Back