Domain Manager
Overview | Main menu | Register a New Domain | Transfer your Domain | Email Aliases | Hostnames | Mail Servers | Checkup on your Domain Settings | Renew Domains | Contact DetailsOverview
The Domains section of the Account Manager allows you to manage your domain names. You may:
- register new domain names
- transfer your existing domain names to your user account
- assign your domain names to websites
- define email aliases based upon your domain names, which will forward automatically to the "real" email addresses that you specify
- assign your own mail servers to handle email addresses based upon your domain names
- set up host names based upon your domain names
- check up on the domain name settings that you have entered, to ensure that they are correct
- renew your domain names that you have purchased through your user account
- change the contact information for domain names purchased through your user account.

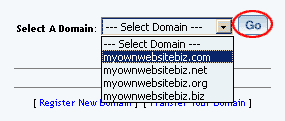
If you have multiple domain names, select the domain that you want to manage and then click on the button "Select Domain".
Back to the Top of the Page
Main
This section allows you to choose the Web site that the domain will point to. You can also register a new domain and transfer a domain to your Web site.
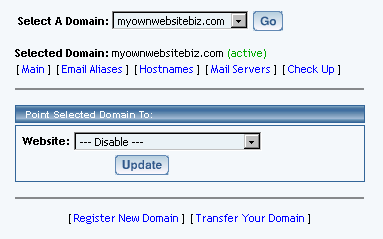
To select a Web site that the domain will point to, choose your Web site in the drop-down menu next to the text "Website". After you have chosen a Web site,...
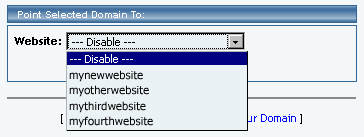
... you must click on the button "Update" to save and apply your changes.

If you need to disable the domain name so that it does not work (temporarily or permanently), select the website as "--Disable--" for the domain name. Back to the Top of the Page
Register New Domain
To register a new domain, click on the "Register a New Domain" link at the bottom of the Domains tool window.

Enter in up to five domain names in the provided fields and then click on the button "Check". The system will then check for the availability of those domain names. (Do not enter "www.".)
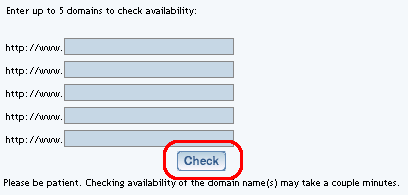
The system will then inform you which domains are available to register, which domains are already taken, and which domains are not formatted properly. If the domain is available, click on the box to the left of the domain name to checkmark the box and select domains. Choose the length of your registration period in the drop-down menu next to the text "Please select the number of years you would like to register your domains for." Once you have selected the domains and specified a registration period, click on the button "Add Domains To Cart".

Click on the red text "Cart" in the top-right corner of the web page to continue with purchasing the domain name(s).
Back to the Top of the Page
Transfer Your Domain
To transfer a domain name to our name servers which will in turn point the domain name to your site, you would use this tool. Please keep in mind that this tool will only allow you to point the domain to a site listed on our servers.
To Transfer Your Domain, click on the blue text "Transfer Your Domain" at the bottom of the Domains tool window.

A prompt will appear at Step 1 of "Transfer your Domain" asking if you have email set up for your domain name. If so (and if you intend to continue that other company's email service), then click "Yes", and your Customer Care toll free telephone number will be displayed.
Before you call Customer Care, please ask your email provider what host names and mail server information will be needed to keep email working once the domain name is transferred to our nameservers. Once you have that information (or have them on the line to speak with us), we will assist you with making those settings in our system. This must be done before you transfer the domain name to our nameservers, or your email service will break!
If you do not have email set up for your domain name, then click "No". The instructions for Step 2 will be displayed.
Contact the registrar of your domain name so that you can transfer your domain name to our name servers. Step 2 gives detailed information on what information to provide to your registrar. Or log in to your registrar's Web site "manage account" area and change your domain name's nameserver information to our nameservers, following the information provided under Step 2. Some registrars require that you specify the nameservers' IP addresses as well as their names.
For Step 3, enter the domain name in the blue text field next to the text "www.", then click on the button "Transfer This Domain". This will add your domain name to your user account so that you may use the Domains tool to point it to your Web site, manage its email, etc. (If you contact Customer Care for assistance with email-related settings required for the transfer, we will perform Step 3 for you. You will still need to use your registrar's tools to perform Step 2, so that the domain name is moved to our nameservers.)

Back to the Top of the Page
Email Aliases
By default, your domain name is set up for email forwarding. Email forwarding allows you to define email aliases that will redirect email to an actual email address. So, for example, you can set up test@mydomainname.com to redirect to your real email address of testingemail@yahoo.com. Important: Email alias settings will not be used if you have set up your own mail server information.
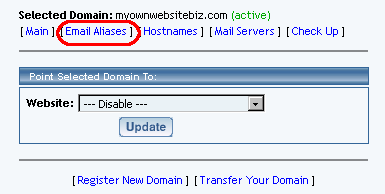
To set up email aliases, click the "Email Aliases" link in the Domains tool.
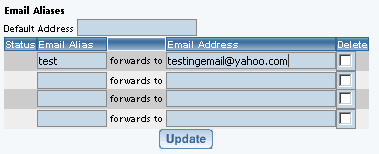
Specify your default email address in the field next to the text "Default Address". Any email aliases that you do not define will re-route email to the default email address. For example if you do not define GGGGG@mydomainname.com and someone sends to that email alias, you will still get that person's email at your default email address.

In the text boxes provided, specify the email aliases under the column "Email Alias" and specify the email address the alias will re-route to under the column "Email Address". For the earlier example given above, "test" would be in the left column and "testingemail@yahoo.com" would be in the right column.
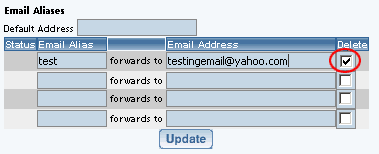
To delete email aliases, checkmark the box in the column "Delete" for the email alias.
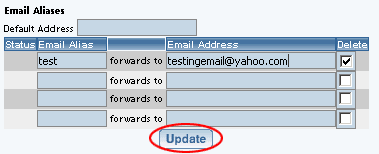
When done modifying your email aliases, click on the button "Update" to save and apply your changes. Your changes will take effect in approximately 24 to 48 hours.
Back to the Top of the Page
Hostnames
The "www." that you often use when typing a domain name is referred to as a subdomain. Our system automatically sets up the "www." for you, to point to your assigned Web site. The Hostnames section allows you to assign additional subdomains for your domain name, for example if your email provider requires special host names. Examples of such custom subdomains are smtp.mydomainname.com, webmail.mydomainname.com, etc.
To set up subdomains based upon your domain names, click the "Hostnames" link on the Domains tool page.
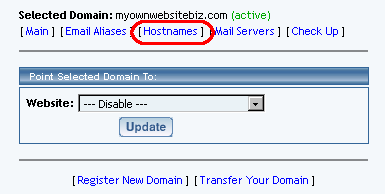
If you want to point your domain name to another Web site hosting server, specify the IP address of the Web site hosting server in the provided field next to the text "Default Host XXXXX.YYY points to".

To set up your hostnames, enter the subdomain under the column "Host" and enter the IP address or existing hostname that it will point to under the column "Host/IP". For example, let's say that your email provider has set up a mail server for you named "mail.mydomainname.com", and has assigned it the IP address "201.87.111.6". In the first empty box on the left, type "mail" (without the quotes). In the box on the right, type "201.87.111.6".
Or to set up hostname "webmail.mydomainname.com" and make it point to the same location as your email provider's mail server named "mail.emailco.net", you would enter "webmail" in the box on the left and "mail.emailco.net" in the box on the right. Our software will automatically generate A or CNAME records as needed, depending upon whether an IP address or host name is entered in the box on the right.

To delete your hostanmes, checkmark the box in the column "Delete" for your hostname.

When you are done making modifications to your hostnames, click "Update" to save and apply your changes. The changes will take effect in approximately 24 to 48 hours.

Please keep in mind that if you are unsure of what information to put where, please consult with Technical Support before proceeding. Entering incorrect data could cause your domain name or email to not function properly.
Back to the Top of the Page
Mail Servers
If you already have email addresses associated with the domain name (that is, you have set up email accounts that are based upon your domain name, and you log in to those actual accounts to send and receive email, e.g. sales@myowndomainname.com), contact the company that is providing you with email and ask them for how your mail servers need to be identified to the Internet. This will include the settings needed in MX records plus any special hostnames based upon your domain name that need to be defined.
To set up your mail server information, click the "Mail Servers" link on the Domains tool page. Important: If you set up your own mail server information, any email alias settings that you have entered will not be used.
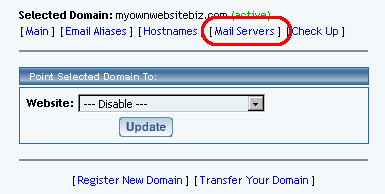
First, define any hostnames based upon your domain name that are needed for your email setup (such as "mail.yourdomainname.com"), and have obtained any other necessary mail server information from your email provider, then enter the mail server name(s) in the provided fields under the column "Server". Set the priority for each mail server by selecting the number from the dropdown menu under the column "Priority". The mail server with the lowest number will be used first when email is sent to your email addresses.
For example, if your email provider says that your domain name's email addresses use a mail server named "mxmail.samplecompany.thatdoesnotexist.com", then enter "mxmail.samplecompany.thatdoesnotexist.com" under the column "Server" and select any number from the dropdown menu under the column "Priority". If your email provider tells you that a secondary mail server also needs to be defined, in case the first one isn't working, then enter the second mail server's name or IP address in the second row's "Server" text box, and select a number from the second row's "Priority" dropdown menu that is higher than the number you chose for the first mail server.

To delete a mail server entry, check mark the box under the column "Delete" for the mail server. (You will need to delete all mail server entries in order to re-enable the use of email aliases.)

When done making modifications to your mail server, click on the link "Update" to apply your changes. The changes will take approximately 24 to 48 hours to take effect.

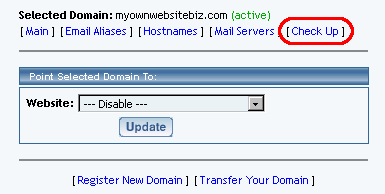
Please keep in mind that if you are unsure of what information to put where, please consult with Technical Support before proceeding. Entering incorrect data could cause your domain name or email to not function properly. Use the Check Up link on the Domains tool page to check for basic errors such as misspelled or undefined mail server hostnames.
Back to the Top of the Page
Check Up
This option allows you to run a check on your domain name settings to detect any basic errors. The Domains Tool will then report back any warnings or problems with the Domain Name(s). Common errors that can be detected include typos in your mail server settings, or invalid hostname settings such as trying to make a subdomain point to a hostname that does not exist.
If you are unsure about a warning or issue, please contact and consult with Technical Support before proceeding. Certain warnings or issues may cause your domain name or email to not function properly.
Back to the Top of the Page
Renew
If you purchased a domain name from us, you will have the ability to renew the domain name via the Domains tool. If you have not registered your domain name from us, you will need to contact its registrar to renew it.
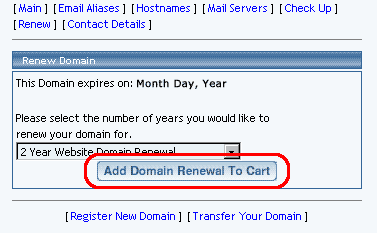
To renew your domain name, click the "Renew" link on the Domains tool page. Choose the length of your renewal period in the drop-down menu next to the text "Please select the number of years you would like to renew your domain for." Then click on the button "Add Domain Renewal To Cart".
Click on the "Cart" tab on the Account
Manager's secondary navigation bar to continue with renewing the Domain
Name.
Back to the Top of the Page
Contact Details
To change the registered information for a domain that you purchased with
us, you would click on the blue text link "Contact Details". You will see
the following screen where you can change the information for your domain:
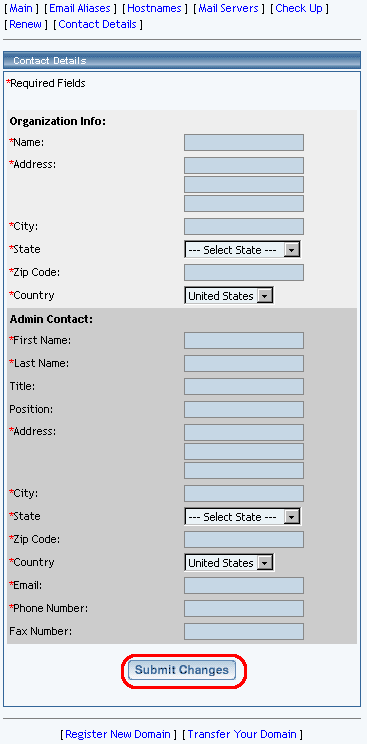
All fields marked with a red asteriks are required fields. When you are
done making the changes, you would click on the button "Submit Changes"
to save your changes to your domain name. Changes will take approximately
24 hours to propagate.