Ecommerce Options
Related Links: 10-Step Guide on Setting Up E-CommerceOverview | Add and Modify Payment Methods | Merchant Account Options | Checkout Descriptions | Custom Fields | Other Options
Overview
Set up or modify payment methods, merchant account information, shopping cart options and checkout descriptions.
Navigation: Click on the "Ecommerce" text link located at the top of any main administration page. Click on the "Ecommerce Options" text link to load the ecommerce administration page.
Back to the Top of the Page
Adding and Modifying Payment Methods
View, add or modify payment methods available to customers at check out.
Navigation: Click on the "Ecommerce" text link located at the top of any main administration page. Click on the "Ecommerce Options" text link to load the ecommerce administration page.
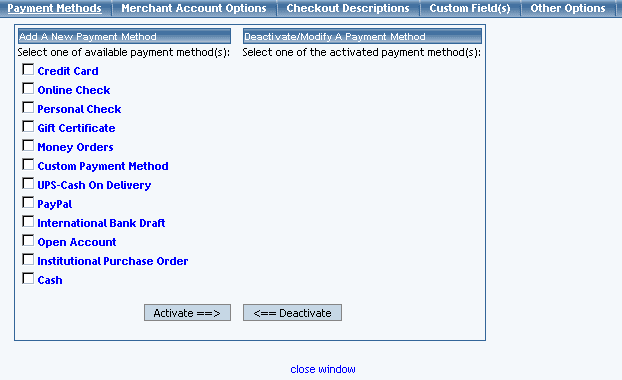
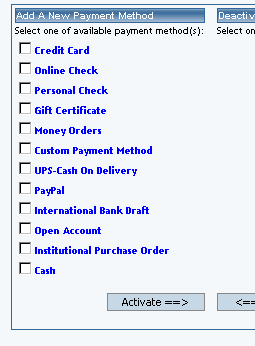
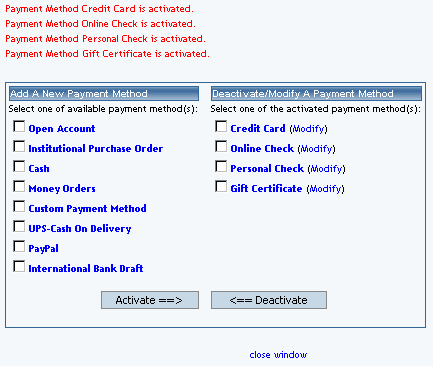
Any available payment methods are located in the left-hand column under "Add a New Payment Method".
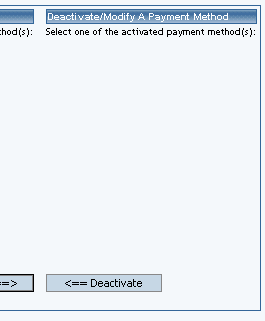
Currently used payment methods are located in the right-hand column under "Deactivate/Modify A Payment Method.
To activate an available payment method(s), check any applicable box next to the payment method name. Click on the "Activate" button.
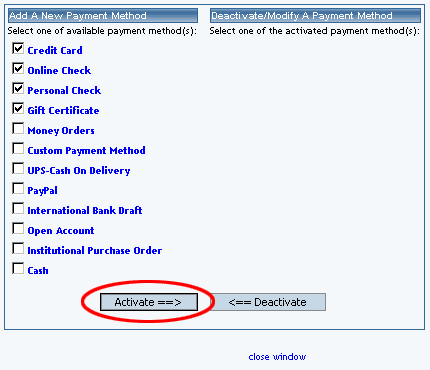
The screen will refresh with the chosen payment method(s) now listed in the right-hand column.
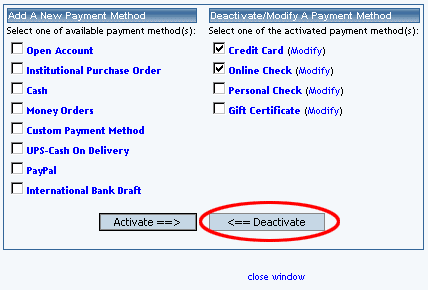
To deactivate any payment method(s), check any applicable box next to the active payment method name. Click on the "Deactivate" button.
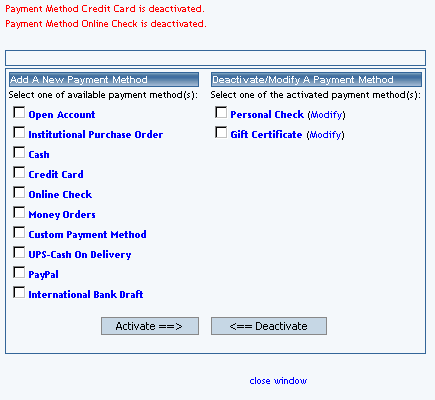
The screen will refresh with the chosen payment method(s) now listed in the left-hand column.
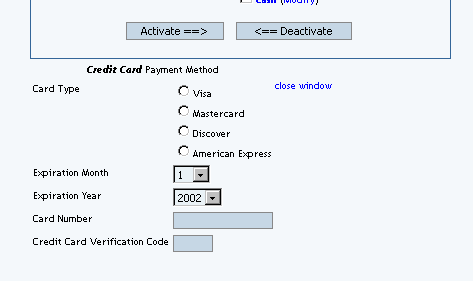
To view the information that a payment method requires, click on the name of the method. An example which including all required fields will be displayed at the bottom of the administration page.
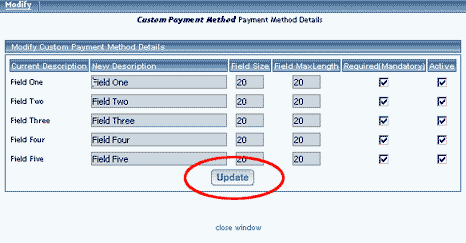
To use a payment type not listed, modify the "Custom Payment Method" from the list of available methods. You will then see the following new window:
Back to the Top of the Page
Modify a Payment Method
Modify payment method details, including sub-types and required fields.
Navigation: Click on the "Ecommerce" text link located at the top of any main administration page. Click on the "Ecommerce Options" text link to load the ecommerce administration page. Click on the "modify" text link next to any currently active payment method. The payment modification administration page will load in a new browser window.
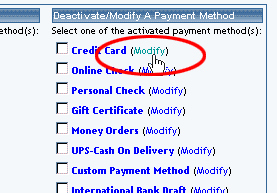
To add a custom credit card type or a custom online check type, first click on the "modify" link next to the payment method. When the new page loads, click on the "Add New Card Type" text link.
For example, a custom checking account type or a new credit card may be defined and used in the shopping cart system.
To add a new card type, click on the "Add New Card Type" text link located below the list of cards. The add card type administration page will open in a new browser window.
The field size, referring to how many characters can be displayed in the field at one time, can be customized by typing a new value in the space provided.
The add card type administration page will load in a new browser window.
To add one of the major credit cards as a compatible payment method, click on the card name from the list provided and then click the "Add" button.
To define a custom card type, type an identification code and card name in the spaces provided below the "Create Your Own Card Type" heading. Click the "Add" button.
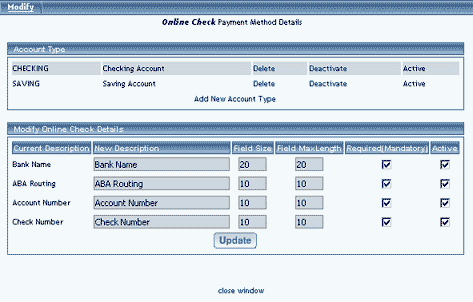
To activate or deactivate any account type, click on the "Activate/Deactivate" text link located next to applicable account name. The status of the account type is displayed with an "active" or "inactivate" text label located to the far right of the card type.
The current description is located in the first column of the details...
...and the new description is located in the second.
Type the new text to display in the space provided. As an example, "Bank Name" could be changed to "Financial Institution".
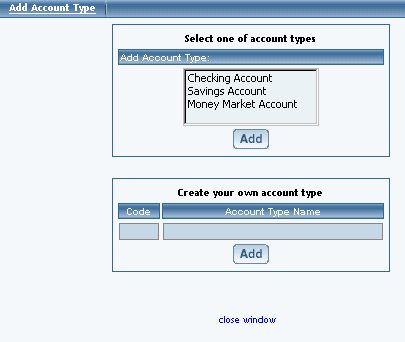
To add a currently existing account type, click on the account name from the list provided. Click the "Add" button.
To define a custom account type, type an identification code and account name in the spaces provided below the "Create Your Own Account Type" heading. Click the "Add" button.
The current default credit card processor is listed at the top of the administration page.
If "Email Processing" is listed, there is no payment gateway or merchant account currently activated as default. All orders must be manually processed.
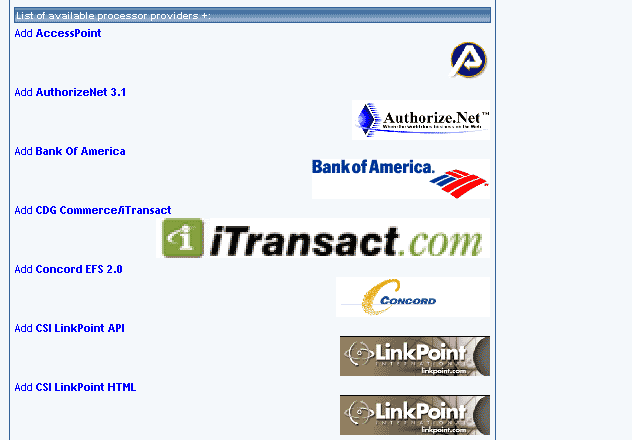
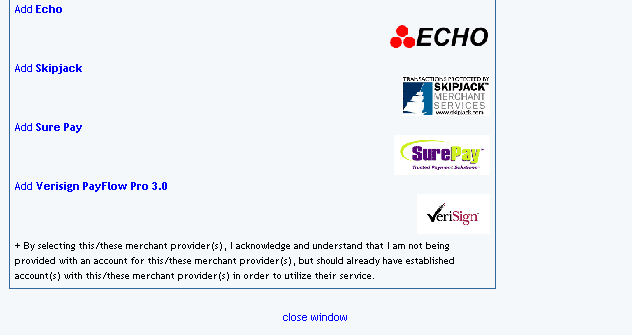
To add a processing method/merchant account, click on the "add" text link next to the name of the processor to add, located toward the bottom of the administration page in the section "List of available processor providers.
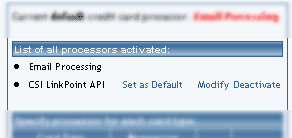
To set any listed processing method as the default, click on the "Set as Default" text link next to the name of the method.
To activate or deactivate any method, click on the "Activate" or "Deactivate" text link next to the name of the method.
To modify an existing method, used only to change processor-specific information only, click on the "modify" link next the name of the method.
The processor modification page will load in a new window. Edit any necessary fields, and press the "update" button to save the changes.
If the desired merchant account/payment processor is not listed, the provider may not be supported. Please contact technical support for additional information.
The "change processor for card type" administration page will load in a new window. Select the desired processor from the list provided. Click "Update" to save the change.
Seven custom descriptions can be added/modified for use on the shopping cart checkout pages. The descriptions appear toward the top of each page.
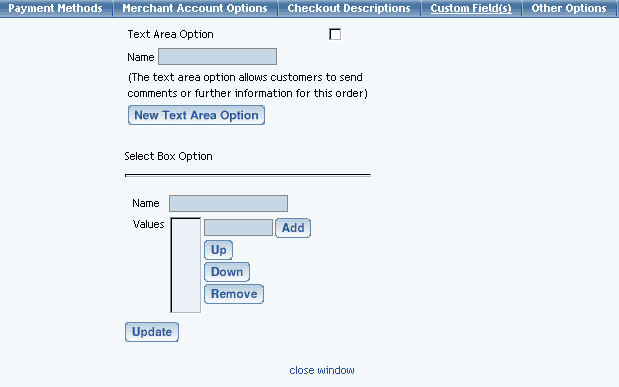
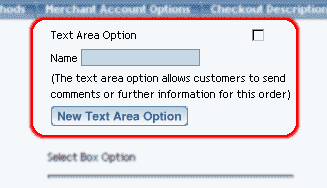
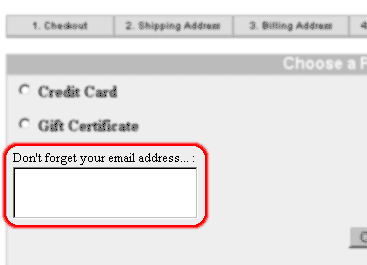
The first section allows you to specify a text area for the customer to add their own comments or words. Checkmark the checkbox to the right of the text "Text Area Option". Enter text in the text field "Name" that you would like to have appear during the checkout process next to the text area.
For example, if you put in "Don't forget your email address..." in the field "Name", this is what will appear:
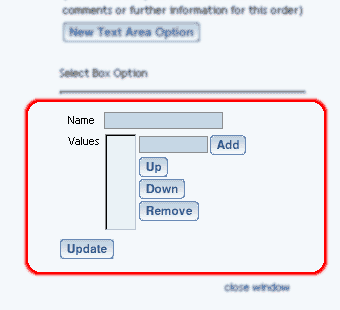
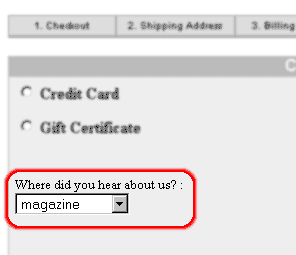
You can also give your Web site customers a drop-down menu to select from. The second section on the page allows you to specify your drop-down menus. Enter a name for the drop-down menu, whatever is in this field will appear on the Web site during the Payment page of the checkout process next to the drop-down menu. Enter your drop-down menu selections in the text field next to the button "Add". Then click on the button "Add". Click on "Update to save your changes.
For example, if you put "Where did you hear about us" in the "Name" field of the drop-down menu, you would get something like this:
Back to the Top of the Page
Credit Cards
Modify credit card fields and descriptions. Add an existing card type. Create a custom card type.
To activate or deactivate any card type, click on the "Activate/Deactivate" text link located next to applicable card type. The status of the card type is displayed with an "active" or "inactivate" text label located to the far right of the card type.

Back to the Top of the Page
Modifying Credit Card Details:
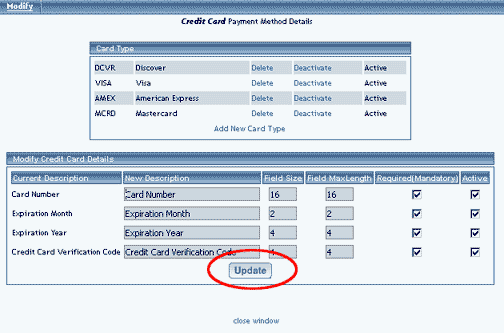
All field descriptions can be customized. The current description is located in the first column of the details and the new description is located in the second. Type the new text to display in the space provided. For example, "Card Number" could be changed to "Credit Card Number".

The field maxlength, referring to how many maximum characters can be entered into the field, can be customized by type a new value in the space provided.
Any field in the payment method may be selected as a required or optional field, and may be set to active or inactive. Check the appropriate box(es) next to the field to be changed.
The CVV code will be transmitted to a merchant account through the payment gateway (if applicable), but will not be stored on the servers.
When finished, click the "Update" button to save any changes.
Back to the Top of the Page
Add a New Card Type
Add a card type that has been deleted. Add and define a new custom credit card.
Navigation: Click on the "Ecommerce" text link located at the top of any main administration page. Click on the "Ecommerce Options" text link to load the ecommerce administration page. Click on the "modify" text link next to "credit cards". If necessary, activate the credit cards payment method before proceeding. The credit card payment method details administration page will load in a new browser window. Click on the "Add New Card Type" text link.

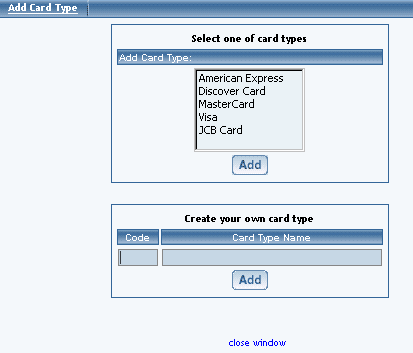
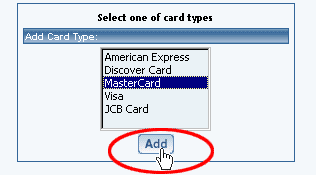
The current administration window will refresh, and then the credit card payment method details (modify) administration page will focus. The new card type will display on the active cards list.
Back to the Top of the Page
Online Checks
Modify online check descriptions and data fields. Add an existing account type. Create a custom account type.
Back to the Top of the Page
Modifying Account Details:
All field descriptions can be customized.

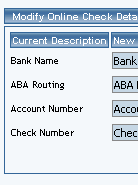
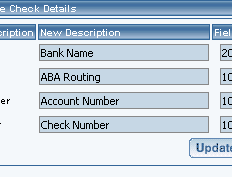
The field size, referring to how many characters can be displayed in the field at one time, can be customized by typing a new value in the space provided.
The field maxlength, referring to how many maximum characters can be entered into the field, can be customized by type a new value in the space provided.
Any field in the payment method may be selected as a required or optional field, and may be set to active or inactive. Check the appropriate box(es) next to the field to be changed. When done with your modifications, you must click on the button "Update" to save and apply your changes.
Back to the Top of the Page
Add a New Online Check Account Type
Add an account type that has been deleted. Add and define a new custom account type.
Navigation: Click on the "Ecommerce" text link located at the top of any main administration page. Click on the "Ecommerce Options" text link to load the ecommerce administration page. Click on the "modify" text link next to "online checks". If necessary, activate the online check payment method before proceeding. The online check payment method details administration page will load in a new browser window.
Click on the "Add New Account Type" text link. The add account type administration page will load in a new browser window.
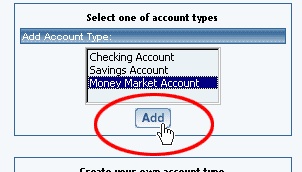
The current administration window will refresh, and then the online check payment method details (modify) administration page will focus. The new account type will display on the active cards list.
Back to the Top of the Page
Other Payment Methods
Modify payment method descriptions and data fields.
Navigation: Click on the "Ecommerce" text link located at the top of any main administration page. Click on the "Ecommerce Options" text link to load the ecommerce administration page. Click on the "modify" text link next to the payment method to modify.
If necessary, activate the payment method before proceeding. The specific payment method details administration page will load in a new browser window.
All field descriptions can be customized. The current description is located in the first column of the details and the new description is located in the second. Type the new text to display in the space provided.
The field size, referring to how many characters can be displayed in the field at one time, can be customized by typing a new value in the space provided.
The field maxlength, referring to how many maximum characters can be entered into the field, can be customized by type a new value in the space provided.
Any field in the payment method may be selected as a required or optional field, and may be set to active or inactive. Check the appropriate box(es) next to the field to be changed.
Back to the Top of the Page
Merchant Account Options
Navigation: Click on the "Ecommerce" text link located at the top of any main administration page. Click on the "Ecommerce Options" text link to load the ecommerce administration page.
Click on the "Merchant Account Options" text link located at the top of the administration page.
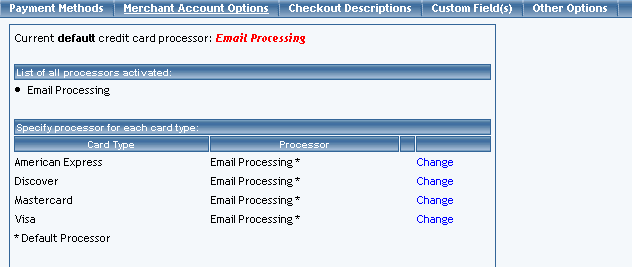
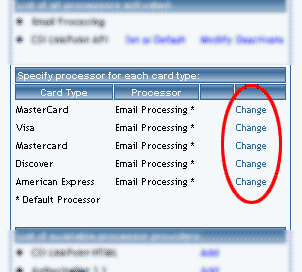
A list of all currently active processors is listed at the top of the administration screen.
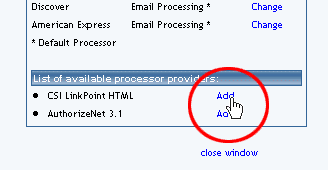
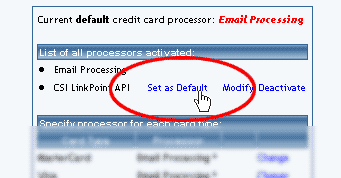
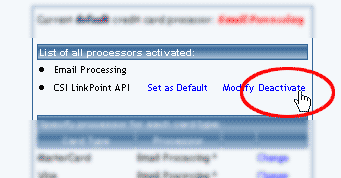
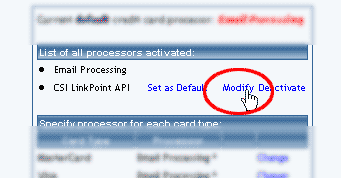
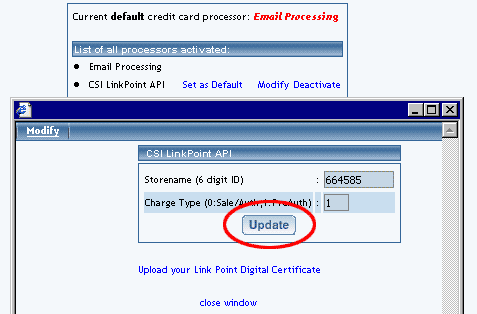
To change the processor for a specific card type, click on the "change" text link.
Back to the Top of the Page
Checkout Descriptions
Add or change a custom text description to each page in the order checkout process
Navigation: Click on the "Ecommerce" text link located at the top of any main administration page. Click on the "Ecommerce Options" text link to load the ecommerce administration page.
Click on the "Checkout Descriptions" text link located at the top of the administration page. The checkout descriptions administration page will load in a new browser window.
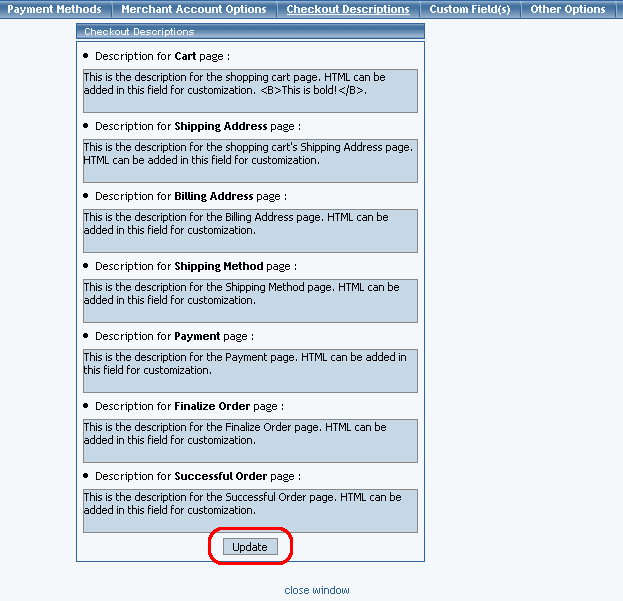
List of Descriptions:
When finished, click the "Update" button to save any changes.
Back to the Top of the Page
Custom Fields
The "Custom Fields" tab allows you to specify your own field(s) that will appear on the Payment page during the checkout ordering process. The following page loads when you click on the tab "Custom Fields":
Back to the Top of the Page
Other Options
Show/hide cart content after adding item to cart, modify order faxing, format order e-mail confirmation, enable/prevent zero shipping charges, change real time processing for international credit card orders
Navigation: Click on the "Ecommerce" text link located at the top of any main administration page. Click on the "Ecommerce Options" text link to load the ecommerce administration page.
Click on the "Other Options" text link located at the top of the administration page.
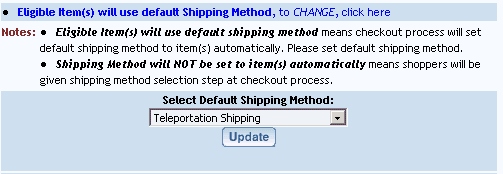
All listed options have two settings. To toggle any option, click on the main description. The page will refresh and display the new setting.
Option 1:

Option 2:

Option 3:

Option 4:

Option 5:

Option 6:

Option 7:
Option 8:

Option 9:

Option 10:
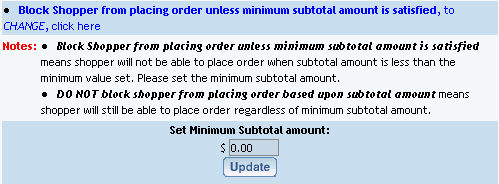
Option 11:

Option 12:

10-Step Guide on Setting Up Ecommerce
Back to the Previous Page