Database Manager
The Database Manager allows you to quickly store, sort, and display information on your site. This can be used to store a variety of things, such as products, employees, or members. The database can be filtered and searched, and visitors can submit new information to it using a form.
- Creating a New Database
- Adding Fields to Your Database
- Adding Data to Your Database
- Using a Tab-Delimitted File to Update Your Database
- Displaying Your Database on a Page
- Integrating Your Database With a Form
Creating a New Database
- Go to Tool Box
- Click Database Manager
- Type in a name for your new database, then click Create New Database

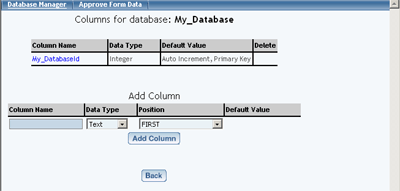
Adding Fields to Your Database
- Select your database from the Database Manager
- Click Edit Columns

- Type a name for the new field, and choose a Data Type and Position

- Repeat as needed
To edit an existing entry, simply click on the area you would like to edit, and change the entry as needed.
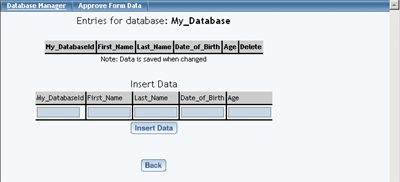
[Back]Adding Data to Your Database
- Select your database from the Database Manager
- Click Edit Data

- Fill out each field with the desired content
- For images, click No Image to bring up the same image selection window used elsewhere in the software
- For links, the content you enter will be used for both the link and the text that appears on the pages. For outside sites, make sure to use the full http:// address (ie http://www.google.com).
- Click Insert Data

- Repeat as needed
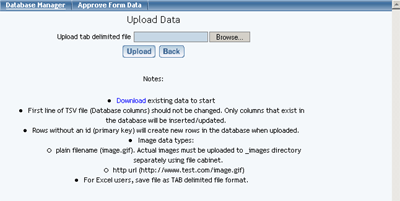
Using a Tab-Delimitted File to Update Your Database
If you have a spreadsheet program (such as Microsoft Excel), you can use it to quickly add database information into one file, and upload it to your site. Just like with the product catalog, this can save tons of time spent creating entries one-by-one.
- Select your database from the Database Manager
- Click Download Data

- When prompted, save the file to your computer
- Open the file (easiest with a spreadsheet program such as Excel)
- Fill out each field as desired, and repeat for each new entry (for hints on filling out fields, click Upload Data)
- When finished, save the file
- Back in the Database Manager, click Upload Data
- Use Browse to find the file on your computer, then click Upload
