Contact Manager
Overview | Contacts | Mail Lists | Send E-mail | To-do ListOverview
The Contact Manager allows you to manage your contacts, create mailing lists, and send e-mail. Please be advised that the Contact Manager must NOT be used to send unsolicited bulk e-mail (or spam).

To get to the Contact Manager from the Administration home page, click on the blue text of your sitename. In the secondary navigation menu, click on "Tool Box". Click on "Contact Manager".
Back to the Top of the Page
Contacts
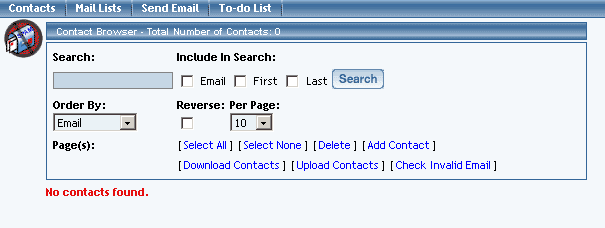
The "Contacts" tab of the Contact Manager allows you to see a list of your contacts (if any), search for contacts, assign and remove contacts on Mailing Lists, and manage contacts (edit, remove, and add). If you just started the Contact Manager, you will not have any contacts in the contact list - you will have the red text "No contacts found" on the screen. You will see the following screen:
-
Add Contacts
You can add contacts to the Contact Manager by going to the "Add Contact" link.

Input all of the information for your contact, and then click on the button "add" to add that contact to your contact list.
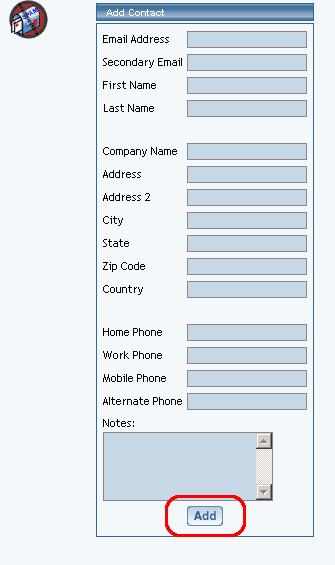
The only required information is that the contact must have an e-mail address or a first name in order to be added as a contact. After you click on the button "Add", the system will report to you that the contact has been added:

If you want a form to import directly to the Contact Manager, please click here for detailed information on the process. This is the only other method to add contacts to the Contact Manager.
If you have a list of your contacts in a spreadsheet program, you have the ability to upload to and download from the Contact Manager.
-
Upload Contacts
From the Contact Manager, click on the link "Upload Contacts". You will see the following screen:
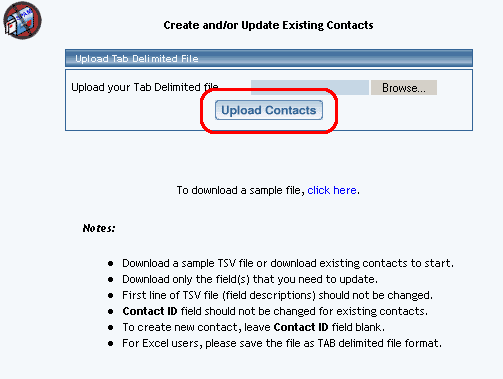
To download an example of how to format your list of contacts in the spreadsheet, click on "click here" next to the text "To download a sample file,". The system will then refresh the screen to show:
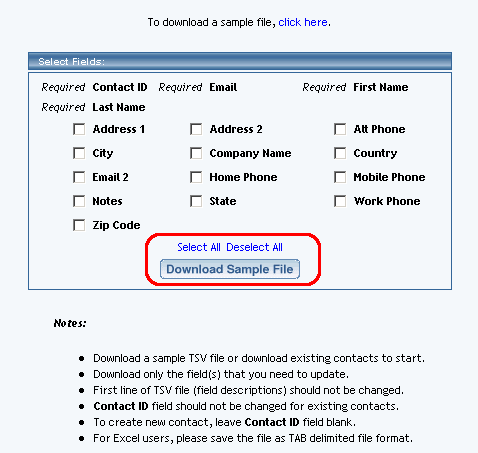
Checkmark all the optional fields that you need. If you bring the file in to a spreadsheet program, you will see something like the following:


When done editing your spreadsheet with all the contacts, save the file as a tab-delimited text file to your computer [ Macintosh users, save the file as "Text (Windows)" ].
Once you have a tab-delimited text file of your contacts, click on the button "Browse" to find the file on your computer.
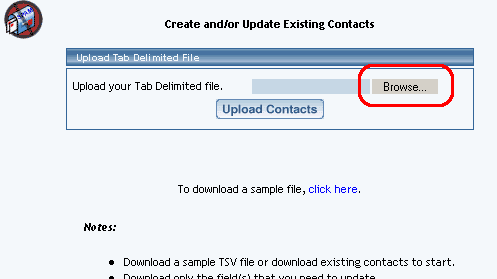
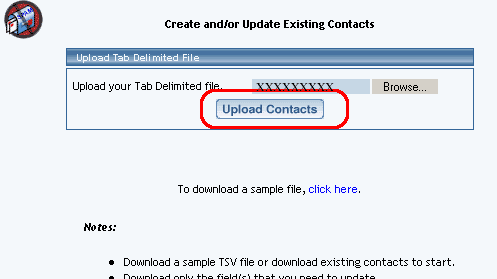
Once you have selected the file on your computer, click on the button "Upload Contacts" to upload your contacts to the Contact Manager.
Download Contacts
From the Contact Manager, click on the link "Download Contacts". You will see the following screen:
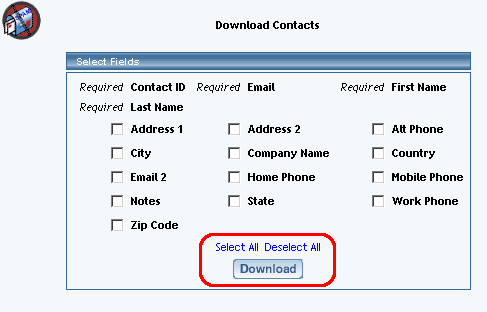
Checkmark all of the optional fields that you want to download, then click on the button "Download". This will save a tab-delimited text file to your computer with a list of all of the contacts in the Contact Manager.
Back to the Top of the Page
Manage Contacts
Once you have contacts to manage, you will be able to use the other functions of the Contacts section. You can search for a particular contact by typing in the search text in the provided text field.

Click on the squares next to the text "Email", "First", or "Last" to search by e-mail, first name, or last name, respectively. When you are done, click on the button "Search" to have the Contact Manager display the search results.
The list of contacts can also be sorted using the drop-down menu under the text "Order By:". You can sort by the e-mail address, first name, last name, or the creation date. If you want to reverse the sort order, click on the square under the text "Reverse". In the drop-down menu under the text "Per Page", select the number of contacts that you would like ot have displayed on the page. To apply your search sorting, click on the button "Search".
Back to the Top of the Page
Delete Contacts
To delete contacts, click on the empty square to the left of the contact name for every contact that you wish to remove.

When done selecting all of the contacts you wish to delete, click on the blue text "Delete". Please be advised that deleting a contact is an irreversible process.
Back to the Top of the Page
Add Contacts to Mail List
Once you have created at least one Mail List, you can assign contacts to that mail list. The Contacts section will have a new section if you have at least one mail list:
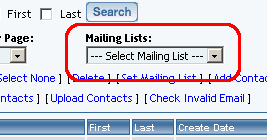
If you select a mail list in the drop down menu, the contact Manager will checkmark and highlight all of the contacts in the mail list:
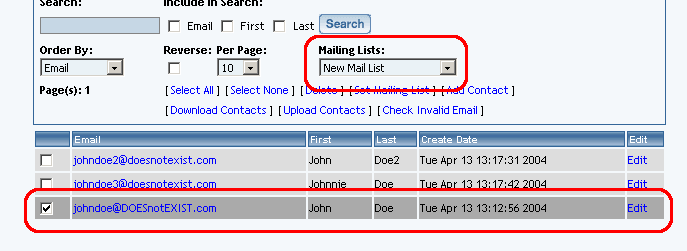
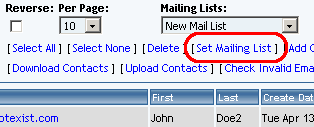
Click on the squares to the left of the contact so that the contacts you want for the mail list are all selected (to remove a contact from the mail list, simply un-check the contact). Once you have them all selected, click on the blue text "Set Mailing List" to designate all of the selected contacts to the specified mail list.
Back to the Top of the Page
Mail Lists
Mail Lists give you the ability to create an e-mail group. You can then assign contacts to this e-mail group by using the "Contacts" tab or the Upload/Download Mail List links. Mail Lists allow you to send an e-mail to the whole mailing list without remembering every single e-mail address or having to input all of the e-mail addresses manually.
To create a mail list, input a name for your mail list in the provided text field. Your mail list's name can only consist of letters, numbers, or spaces. When you are done entering in the mail list name, click on the button "Create" to create your mail list. You may also create/modify Mail Lists quickly using the "Upload Mail Lists" and the "Download Mail Lists" links.

The system will then inform you that the mail list has been created.
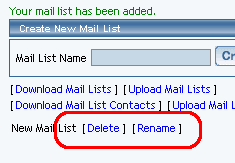
After the mail list has been created, below the "Create New Mail List" section, you will see the name of your mail list and blue text links to "Delete" and "Rename" that allow you to delete the mail list and to rename the mail list, respectively.
Click on the link "Download Mail Lists" to download a tab-delimited text file that will contain all of your Mail Lists. Click on the link "Upload Mail Lists" to upload your tab-delimited text file with your contacts.
To quickly assign contacts to your existing Mail Lists, you would use the "Upload Mail List Contacts" link. To see an example of the format to use for the tab-delimited text file, use the link "Download Mail List Contacts".
Back to the Top of the Page
Send E-mail
The Send E-mail option of the Contact Manager allows you to send e-mail within the 3.0 software. You may send e-mail to any of your mailing lists that you have added, and/or to -email addresses that you specify. The form allows you to specify a subject for your e-mail and a message. All recipients will be identified as "blind carbons" to protect their privacy (basically, none of the receipients will see the e-mail addresses of the other recipients).
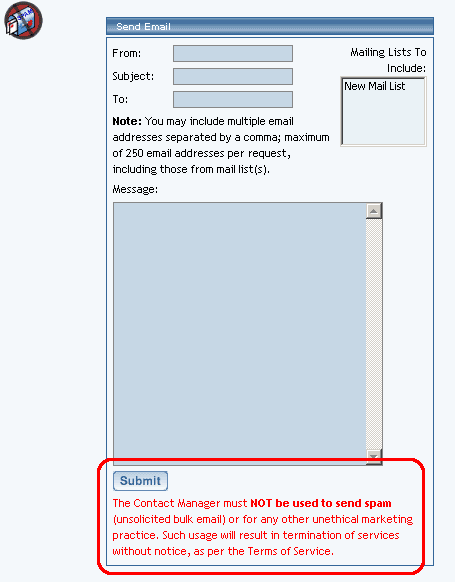
Fill out the e-mail address that will be designated as the "From" e-mail address. Fill out the subject and message of the e-mail in the fields "Subject" and "Message". To send the message to your mail list, click on the mail list name. If you have multiple mail lists set up, hold down the CTRL key on your keyboard and then click on multiple mail list names.
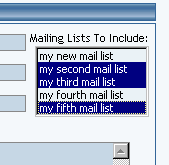
If you want to designate individual e-mail addresses, fill in those e-mail addresses in the field "To". If you have multiple e-mail addresses to send in the "To" field, separate each of them with a comma (,). When you want to send the message, click on the button "Submit".
Please be advised that the Contact Manager must NOT be used to send spam (unsolicited bulk e-mail) or for any other unethical marketing practice. Such usage will result in termination of services without notice, as per the Terms of Service.
Back to the Top of the Page
To-do List
The To-do List option of the Contact Manager allows you to create, manage, and delete "To-do" appointments. When you click on the To-do List option, you will see a list of all of your "To-do" appointments (if any).

Create a To-do appointment by clicking on the button "Add". The Contact Manager will reload with options to add a To-do appointment:
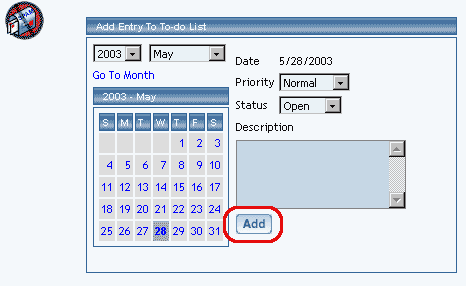
Click on a date that you would like to set your To-do appointment for...
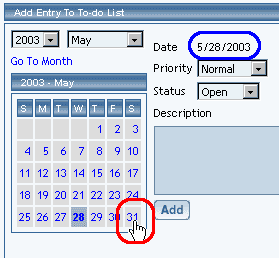
...and the date will change.
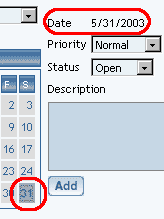
If you are setting a To-do appointment for a month (or year) other than the month displayed, select your month and year from the drop-down menu and then click on the blue text "Go to month".
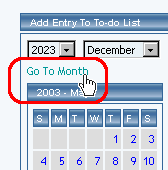
The Contact Manager will reload and display the appropriate month to add a To-do appointment.
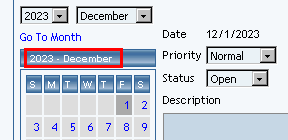
Click on a day to choose that day to add a To-do appointment. Fill out all of the other options for your To-do appointment, then click on the button "Add" to add the To-do appointment.
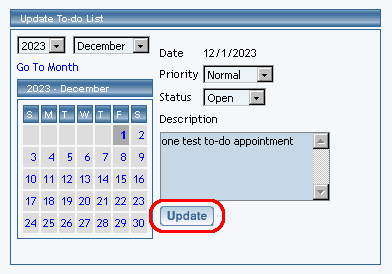
Once a To-do appointment has already been created, click on the blue text of the To-do appointment to edit (you will be able to click on the date, priority, status, or description of the To-do appointment to modify it).

You will be able to update the To-do appointment with more information, as well as change the status, the notes, or the day for the To-do appointment. When done with your changes, click on the button "Update to save your changes to the To-do appointment.
To delete a To-do appointment, click on the red text "Delete" to the right of the To-do appointment.
Back to the Previous Page