Container Component
Table
Related Links: How to Add a Component | How to Modify a Component | Editing BasicsOverview | Edit Table | Modifying Rows or Columns
Overview
The Table Component serves as a container for other components. You can even add tables to a table component. Ideally, you should start your page with a table component so that you position your components with ease.
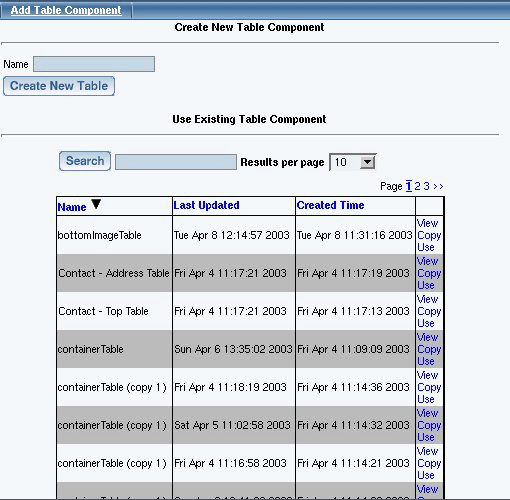
Click on "Page" in the top-left corner of the Page Editor. Click on "Container". Click on "Table".
Edit Table
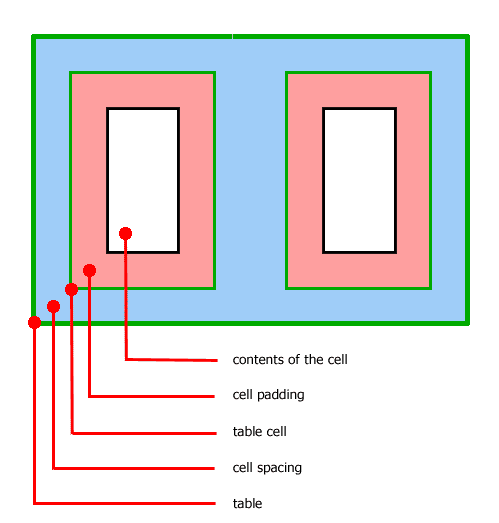
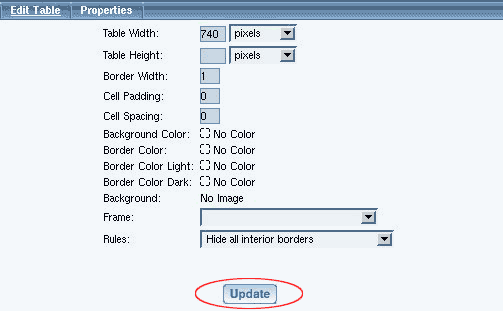
You can specify the table width, table height, border width, cell padding and cell spacing for the table. Cell padding is the area around the contents of the cell. Cell spacing is the area around the cell itself.
You can change the colors of the table with respect to the background, border, light border, and dark border. The Background Color will specify a color inside the table itself whereas the Border Color will specify a color for the outline of the table. If you specify a Border Color Light or Border Color Dark, these colors will override the Border Color. Border Color Light and Border Color Dark add color shading to the table. All of the border colors will only show up if the Border Width is a number larger than zero (0).

The Background Image will apply a background image to the table itself. The Background Image will be applied in front of the Background Color, so only one can be used at the same time. If your table is larger than the Background Image, the Background Image will be repeated so that the background of the table is completely using the Background Image.
The Frame and Rules options allow you customize the look of the border for the table. The Frame option allows you to "Hide borders", "All borders" (this option is also the default), "Border on top edge", "Border on bottom edge", "Border on top and bottom edges", "Border on left edge", "Border on right edge", and "Border on left and right edges". The Rules option allows you to "Hide all interior borders", "Show all interior borders" (this option is also the default)", "Show borders between columns only", and "Show borders between rows only".
When you are done modifying the options for the table component, click on the button "Update" to save and apply your changes to the Web page.
Back to Edit Table
Back to the Top of the Page
Modifying rows or columns
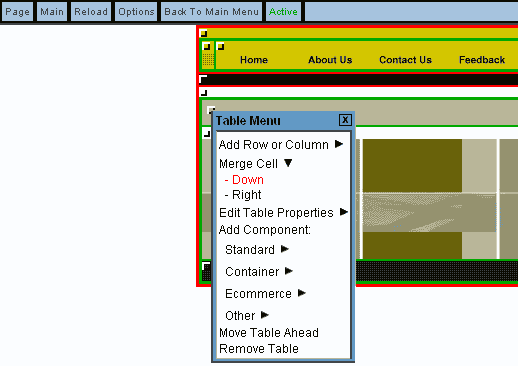
To add cells to the table, click on the editing square in the top left corner of any table cell. When the menu appears, click on "Add Row or Column". Click on the location where you would like to add a column or row. If you choose "Above" or "Below", the Page Editor will add a row above or below the cell you modified, respectively. If you choose "Right" or "Left", the Page Editor will add a column to the right or left of the cell you modified, respectively.
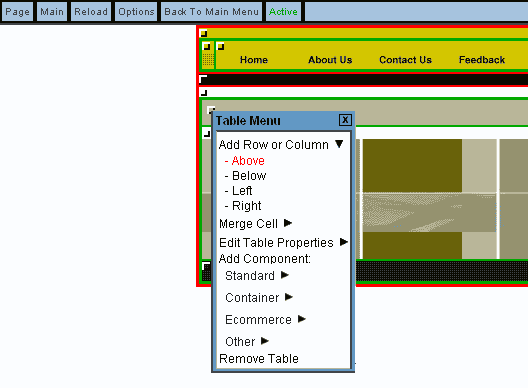
To remove cells from a table, click on the editing square of the table cell you want to remove. Click on "Merge Cell". Depending on the location of the cell you want to remove, you will get options to merge that cell with the adjacent table cells. Click on the cell location that you want to merge your selected cell with.
Please keep in mind, that adding or merging cells will not alter the content in the cells.
Back to Modifying Rows or Columns
Editing Basics
Back